Emergency help please - got a leak

You shouldn't need to go THAT tight... It's not under any real pressure!

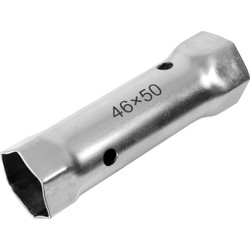
I use these and just get it in there however I have to!

Silverline Wide Jaw Plumbing Pliers Length 250mm - Jaw 85mm (633562)
£6.75
Amazon.co.uk
30-day returns
Ah OK, those are pretty much what I have. It's not that I'm trying to over-tighten it, but everything's so tight under the sink that I can only turn it a few mm each time, then try to approach form a different angle etc, and then the jaws slip off, chewing the nut.

Full disclosure - before trying the Plumber's Mait etc, I just HAD to try nipping it all up with no sealant of any kind, so now of course I'm desperately trying to build an ark to escape the flood. Lesson learned :mad:

When everything's fully dried out later, I'll try making Mait sausages...
 
Sponsored Links
The mechanism which pops the plug up, is usually adjustable - perhaps that is resting too high, preventing the plug sealing.
Ah, sadly my McAlpine unit, from the cheap'n'nasty collection, doesn't have that facility. Unless you tell me different, but it just looks like a one-piece plastic moulding...

20231012_112337.jpg
 
Ah OK, those are pretty much what I have. It's not that I'm trying to over-tighten it, but everything's so tight under the sink that I can only turn it a few mm each time, then try to approach form a different angle etc, and then the jaws slip off, chewing the nut.

Full disclosure - before trying the Plumber's Mait etc, I just HAD to try nipping it all up with no sealant of any kind, so now of course I'm desperately trying to build an ark to escape the flood. Lesson learned :mad:

When everything's fully dried out later, I'll try making Mait sausages...

 
OK, going for it now.

How long do you have to let it dry before testing for leaks please?

Ah OK, read the instructions Roger - seems I don't have to. Well, it doesn't seem to be leaking :love:

Of course, everything else (downstream) may be...
 
Last edited:
Sponsored Links
...and indeed I have slight seepage where indicated. I know it's not straight - never has been, since before my time (possibly since 1994, when the house was built), but the bottom grey pipe is fixed in place, as far as I can tell. I don't like to try and force anything, as I have a tendency to break things :notworthy:

20231016_202403.jpg


The bottle trap clamps onto the grey outlet pipe via the nut which tightens a tapered rubber ring.

I don't know if you can buy the rings, or if I should maybe get a new trap, and hope it'll seal better... the seepage is very small, and only happens if I run the taps for a while, but still...
 
That's either a waterless trap (HEPVo clone) or a straight through trap, probably the former. Unfortunately it looks like a cheaper copy and it'll be the bottom seal that's leaking. Most times, stripping it down and cleaning the seals then a little silicone grease to refit usually sorts it. Either that or replace the trap with a good quality McAlpine or true HEPvO trap.

The grey pipe/fittings are push fit but try to to disturb it, in fact don't even look at it the wrong way, as that will undoubtedly leak too if you do.
 
Most times, stripping it down and cleaning the seals then a little silicone grease to refit usually sorts it.
OK Rab, will do. It's only a sight seep so hopefully that'll work :giggle:
The grey pipe/fittings are push fit but try to to disturb it, in fact don't even look at it the wrong way, as that will undoubtedly leak too if you do.
I'm generally a pretty handy guy, but if there's one thing I've learned in all my years, it is that if I look sideways at ANYTHING concerning plumbing, there will be a flood. It's my Achilles' Heel.

By the way, I went for dilalio's putty method rather than your silicone suggestion as the only thing I hate more than plumbing is trying to remove old silicone :mad:

Cheers both
Roger
 
No bother at all @Roger465 , whatever works for you and the job. They are both tried and trusted methods and it really is horses for courses

BTW that push fit line should have read, try not to disturb it ...

The only time I find silicone to be any trouble at all is removing bits when the spirited DIY'er has used faaaar too much. Even then a nice sharp blade will trim any silicone in 2 secs flat. Then a bit of spirit and the rest is gone or what's left can be silicone'd over. The other thing is you don't need to remove it all. My beef with mait is it doesn't matter how much is used, it always seems to get everywhere when it comes to servicing something with it on it.
 
My beef with mait is it doesn't matter how much is used, it always seems to get everywhere when it comes to servicing something with it on it.

I have found it, because it is sticky, and remains sticky, always provides a lasting seal, even when silicone fails.
 
I have found it, because it is sticky, and remains sticky, always provides a lasting seal, even when silicone fails.
I do have to say that with compression type fittings, silicone should never fail.

I have found that silicone only fails when the site is not prepped correctly, the silicone isn't applied properly or the surfaces that it is sealing moves and break the seal because the fitting wasn't installed correctly.
 
With your fingers, clothes and tools all covered in icky sticky smelly goo ;)
Yup. Well I got about a month out of it, leak-free bliss. So of course I stopped the daily check (bit of bogroll round below the big nut, see if there are any water marks on it), and tonight I saw water seeping out onto the bathroom floor... everything soaked in the cupboard.

So all ripped apart again, will do silicone this time when it's properly dried.

As you say, took me about an hour to clean the mait off everything :mad:

Just one thing... there's obviously a rubber ring underneath, between the big plastic nut and the sink - do I smear silicone on both sides of it?

Thanks YET AGAIN :rolleyes:
 
most of the new waste seal that come with them now are a curved effort, whereby the curved section when tightened up gets pushed up into the gap between the basin waste hole and the shank of the metal waste.

Anyway, remove everything and make sure it cleans up as new , nice and dry and shiny, use some white spirit to get the mait off everything. Then drop the waste back down into the basin hole and line up the slots for the overflow, then fill the gap with silicone all the way around between the shank of the waste at the threads and the throat of the basin waste hole, not too much up into the gap otherwise you will fill the overflow slot. Fit the washer up onto the waste and push it tight up against the bottom of the waste hole, the silicone should hold it there, make sure there is a little bead of silicone where the threads and the washer meets, all the way around and then add the nut, hand tight all the way up then large grips and nip it up. Take any silicone that squeezes out and run it around the outside gap of the washer and the basin and around the threads at the bottom of the nut with your finger, add a little more if there's not enough so it seals the bottom of the nut to the threads all the way around.

Leave for half an hour before testing, though it should be watertight pretty much straight away.
 

DIYnot Local

Staff member

If you need to find a tradesperson to get your job done, please try our local search below, or if you are doing it yourself you can find suppliers local to you.

Select the supplier or trade you require, enter your location to begin your search.


Are you a trade or supplier? You can create your listing free at DIYnot Local

 
Sponsored Links
Back
Top