Fitted wardrobes plan, suggestions appreciated

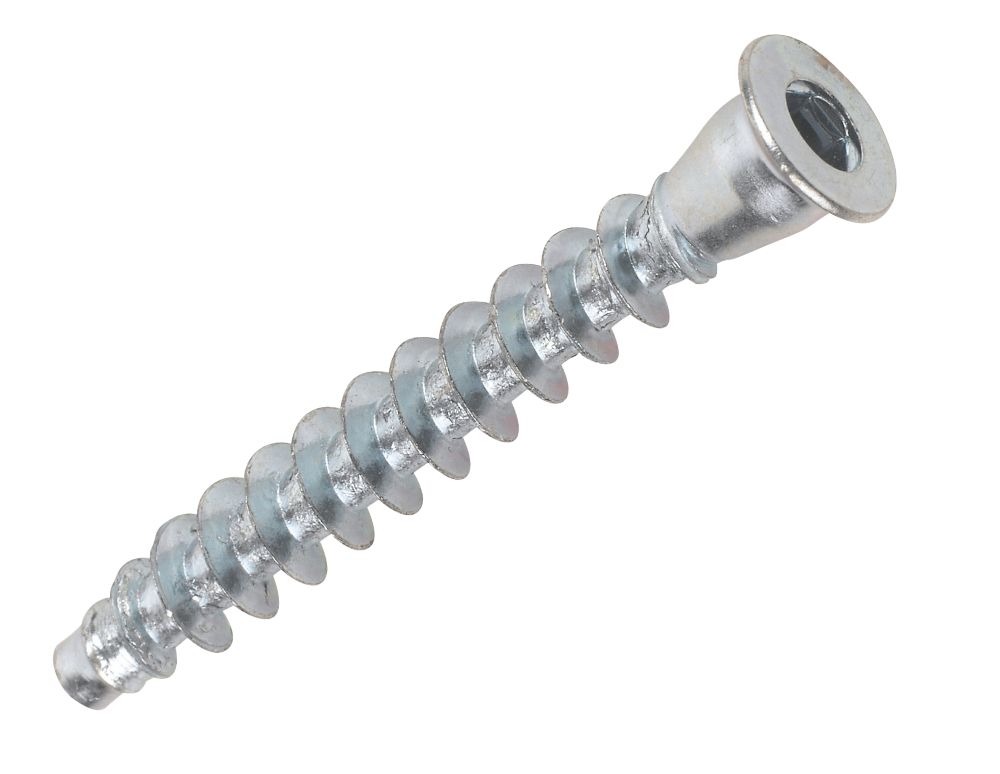
Confirmat screws are your friend for carcase construction, either chipboard of mdf


They are good, but I would recommend buying a confirmat drill bit as well. It will drill the pilot, clearance and countersink in one go.

 
Sponsored Links
I have only seen videos of people grooving door rails using a router table, I can't seem to find video of people using another method @JobAndKnock ?
You probably won't find any because it's very similar to just running a rebate down the edge of material or running a shaped profile. it's a simple edge cut, nothing more, you set the depth of cut then make the pass. It's so simple that I can't see why anyone would make a video of it (it's a bit like asking if anyone has a video on how to boil an egg - although I reca;ll Delia Smith actually publishing a cookery book which explained just that, in detail). If you have a router it won't take long to get the hang of doing edge cuts (remember: material to the left, cutter to the right of the material and push away from yourself) - I used to find with apprentices that it took longer to explain how to do it than actually do it, so I think you need to start using a router and get some first hand knowledge

Im ok on the plunge saw and guide rail, and the need for a flat large bench. No problem. Its the making of the doors if Im going to use the rail and stile method.
How are you going to join the rails to the stiles? Dowels? You'll probably need 2 or 3 cramps as wide as your widest door - ideally the quick release type

The other thing is that you need to fix some of your design ideas before committing to purchasing kit - that way your kit will match the job at hand
 
Last edited by a moderator:
How are you going to join the rails to the stiles? Dowels? You'll probably need 2 or 3 cramps as wide as your widest door - ideally the quick release type

The other thing is that you need to fix some of your design ideas before committing to purchasing kit - that way your kit will match the job at hand

At mate of mine, when making MDF shaker type wardrobe doors with 9mm panels, used to simply route a 9mm channel in the rails and styles and then make 9mm "biscuits" to go in the 25mm rail/style grove. He then used brown parcel tape to pull the joins together. With each pass of the tape around the width of the door he would stretch the tape slightly more to increase the tension. It worked well.

I painted hundreds of his units, often repainting some them years later. I never saw a single door fail.

Kitchen units doors were normally 9mm doors with 9mm rails and styles glued on in a vacuum press.
 
When I eventually get round to doing my own I'll be using a Domino (next year, I hope, but I don't know if I'll be making Shaker doors or trad moulded rsised panel Victorian ones). I think a Domi is a bit expensive for most DIYers, but a dowel jig and 8mm fluted dowels will do the job as well, if a tad slower

The cramp thing is a bit personal - I do sometimes use parcel tape to cramp stuff up, like your mate, but I find it isn't fast enough for me, doesn't always guarantee a glued joint, and decos complain about the glue being ripped out. If you are making up multiple doors you can make a cramp with two parallel 2 x 2s screwed , say, 50mm wider than the widest doors and all clamping done using folding wedges and blocks.
 
Sponsored Links
You probably won't find any because it's very similar to just running a rebate down the edge of material or running a shaped profile. it's a simple edge cut, nothing more, you set the depth of cut then make the pass. It's so simple that I can't see why anyone would make a video of it
Im sure its simple if you're experienced but its difficult for me to visualise as a beginner.

If I have a long rail for a wardrobe door, lets say 2m long, and its only made from 22mm thick MDF, then would I have the piece vertically on its long edge, and run the router along the top of it? It would be only 22mm wide so wouldn't the router be unstable running along the top of that, and how would I get a straight groove in the centre of the rail?
 
Im sure its simple if you're experienced but its difficult for me to visualise as a beginner.
A groover runs along the flat edge and cuts a slot in the edge. The routerdoes not run on the narrow edge, but on the wider flat one. You really need to get a router and a bearing guided rebate bit and run that on a piece of material to see how it works, then when you get a groover it will actually be obvious how it works. This sales video from Trend shows a lot of different bearing guided bits in use including a bearing guided groover (at 0:50 and 4:17) and bearing-guided rebate cutters (@ 2:33 and 2:36)


Note how very few operations require a router table. Note also the use of an auxilliary sub base (at 5:53) to provide more stability when routing edges - these can be home made from a piece of acrylic or polycarbonate plastic from 5mm thick upwards. Out on site I've made them out of stiuff like 12mm MDF and 8mm ply in the past (clear plastic is a lot easier to use, though), using a jigsaw to cut them out. Rough, but serviceable

There is a bearing guided rebate cutter illustrated in this video (at 0:13 and 0:48) together with a rebate being cut using a larger diameter straight cutter and a side fence (at 0:19 and 1:13).


Once again note that it is only really big cutters, stuff like panel raisers, which require a router table. As a novice the bearing guided cutter, whilst more expensive to purchase, is far easier to master. As you may gather, I love my routers - they are so versatile

Sorry these are sales videos, but there is an assumption that users start with a straight cutter and progress, because this is what most people seem to do. One word of caution - steer clear of cheap cutters and sets in general and only buy cutters that you need for a given job. That will save you loads of dosh and/or be able to buy better quality cutters

If I have a long rail for a wardrobe door, lets say 2m long, and its only made from 22mm thick MDF, then would I have the piece vertically on its long edge, and run the router along the top of it? It would be only 22mm wide so wouldn't the router be unstable running along the top of that, and how would I get a straight groove in the centre of the rail?
See my response above, then view the video at about 4:17 which illustrates the use of a bearing-guided grooving set (i.e arbor, groove cutter and bearing), as I recommended earlier

In terms of experience I bought my first router, a secondhand Stanley fixed base, for work in the mid-1970s. My first plunge router (and brand new) was a pale blue Elu (which very few here will be able to date, I'm sure), but before those I had been using routers at work for several years, both static and hand-held portable
 
Last edited by a moderator:
Im sure its simple if you're experienced but its difficult for me to visualise as a beginner.

If I have a long rail for a wardrobe door, lets say 2m long, and its only made from 22mm thick MDF, then would I have the piece vertically on its long edge, and run the router along the top of it? It would be only 22mm wide so wouldn't the router be unstable running along the top of that, and how would I get a straight groove in the centre of the rail?
Groover

 
Having had this challenge many times over the years, I'll add a few thoughts. In the past for doors I have used basic laminated board and lipped it with a wood angle bead to cover the cut edge and provide an edge "frame", mitred on to the corners. Made with just basic saws and mitre boxes before I was rich enough to buy track saws, routers etc. It can look pretty good.

Making carcasses isn't too difficult, but it is also possible to buy cheap ready-mades for many applications, and possibly just make up the odd sized ones.

Several companies make doors to any custom size - e.g. find a local dealer for BA Components - their Bella and Zurfiz ranges are fully customisable - end panels, doors etc in any size and colour, and not expensive. You order them pre-drilled for hinges. Done a few bathrooms like this - wall kitchen carcasses as shallow base units, or custom made and custom doors.

Finally companies like https://www.fittingly.co.uk/ will make custom wardrobes, cabinets etc, including slopes, at reasonable prices (I haven't used them myself), but their prices do make the option of buying tools and making yourself less interesting.

Making everything from scratch is certainly possible, but there is a fairly steep learning curve to get a polished result if this is a first project!!!

Final thought - if the wardrobes are going in an alcove, you don't necessarily even need a carcass - just a front frame carefully fitted in the alcove can be enough, plus some shelf support/rails etc inside.
 
Last edited:

DIYnot Local

Staff member

If you need to find a tradesperson to get your job done, please try our local search below, or if you are doing it yourself you can find suppliers local to you.

Select the supplier or trade you require, enter your location to begin your search.


Are you a trade or supplier? You can create your listing free at DIYnot Local

 
Sponsored Links
Back
Top