Continuing on the off topic trend and @StopHammerTime availability... I need to rearrange the waste pipework (as the new bath has a different placement of the drain) and currently I have a zig-zag solvent weld pipe (with few parts welded). What is the best way to rearrange? If I force the joints will they disconnect or I need to cut the pipe?
Continuing on the off topic trend and @StopHammerTime availability... I need to rearrange the waste pipework (as the new bath has a different placement of the drain) and currently I have a zig-zag solvent weld pipe (with few parts welded). What is the best way to rearrange? If I force the joints will they disconnect or I need to cut the pipe?
Hard to imagine exactly what you mean without a picture. But yes you'll need to cut solvent welve pipes. You don't want any unneccessary bends and bearing in mind solvent weld pipe is about a quid a metre I'd replace the lot, or atleast as close to the exit out the house as possible. Don't be tempted by any flexible bends either!
With two 110 degree bends in close proximity you have a lot more flexibility than you'd first think, once you know your two points (bath waste and house exit) the rest should work its self out. Don't swap to pushfit because your existing external pipe will be solvent type (unless you can see where it changes) and pushfit's crap.
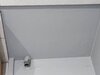
Here is the picture (BTW - I should have done this before doing the tanking...).
The new drain will be where the red * is on the picture, about 6cm closer to the wall than now. About 3-5 cm higher.
I can push the white trap 3cm closer to the wall, but not more, due to the 90 degree elbow.
Ideally I would dethatch 1 from 2 and redo the whole "zig-zag", but if I cut the two parts (that are linked with an insert), then I will need to find a way to remove the half of the insert that is glued inside 1.
If I could twist 1 and 2 so that they dethatch leaving the insert one piece and attached to either 1 or 2, that would be great, but being so close to the wall I am afraid that this could break where I can't repair it.
Bit of a tricky one that, am I understanding corectly the existing pipe work is 32mm?depending on what's on the other side of the wall and how intricate the waste is I'd be tempted to rip a new 40mm hole in the wall central and go straight out (assuming it's a straight 90 into an outlet or something, but if there's loads of pipework feeding into it or a long onward run , not ideal.
Second thought is, since it looks like you'll have a removable panel for access AND you've tanked it - I might take back what I said about using a flexible bit of pipe if it helps!
It is 40 mm and on the outside it is welded to other 2 angles, so I wouldn't want to touch it.
Anyway I gave a try cutting sections using a multitool and then trying to break the smaller parts with a flat screwdriver during the lunch break (the pleasure to work from home ) and I managed to remove as much as I wanted.
It seems the parts weren't welded so well (or they used simple glue).
If you need to find a tradesperson to get your job done, please try our local search below,
or if you are doing it yourself you can find suppliers local to you.
Select the supplier or trade you require, enter your location to begin your search.
Please select a service and enter a location to continue...
Are you a trade or supplier? You can create your listing free at DIYnot Local


") ) and I managed to remove as much as I wanted.
) and I managed to remove as much as I wanted.