How to replace a leaky WC Cistern syphon

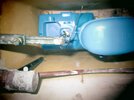
Looking at the state of the wingnuts I can see (one is already missing so that save some work) you'll probably be able to break them off with a good pair of pliers... Then minimal work with cut off blade. Multi tool is best if you have one?
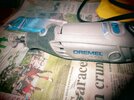
I've attached a photo of my Dremel with a diamond cutter blade mounted in it. Dremel was one of the earliest (if not the earliest) manufacturers of multi-tools.
 

Attachments

  • IMG_9474.JPG
    IMG_9474.JPG
    543.4 KB · Views: 22
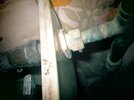
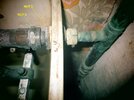
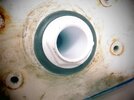
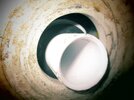
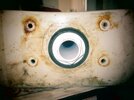
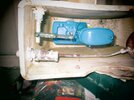
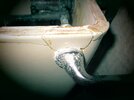
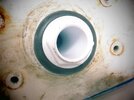
Please take a look at the two attached photos of the water inlet into the cistern, and advise on the best way to detach the cistern from the inlet. IMG_9475_Anno shows both sides of the inlet across the cistern wall, IMG_9476 is a closeup of the inlet on the outside of the cistern wall.

I was thinking of undoing Nuts A & B in photo IMG_9475_Anno and then pulling the cistern to the left of the photo, away from the inlet tube. Is this the best way to do this or have you a better idea?
 

Attachments

  • IMG_9476.JPG
    IMG_9476.JPG
    306.6 KB · Views: 24
  • IMG_9475 - Annot.JPG
    IMG_9475 - Annot.JPG
    370.3 KB · Views: 23
Loosen here and disconnect the cistern.

View attachment 418492
You might also need to unscrew the thin nut and withdraw the fill valve unit into the cistern. That way you'll be able to lift the cistern straight up with no obstructions. Have some large polythene washers to hand for re-assembly to replace the existing packing under the thin nut.
 
You might also need to unscrew the thin nut and withdraw the fill valve unit into the cistern. That way you'll be able to lift the cistern straight up with no obstructions. Have some large polythene washers to hand for re-assembly to replace the existing packing under the thin nut.
I will try to avoid undoing/loosening the thin nut and thereby retain the integrity of the inlet to cistern wall water-tightness. Doing this will also keeping the float-valve in its original position, giving me one less thing to worry about. I have enough clearance to slide the cistern to the left, clear of the inlet pipe (if I only undo the nut pointed to in post #33), a couple of inches to the left will be sufficient to detach the inlet, to be followed by lifting the cistern vertically up.
 
Well Gentlemen, even I was surprised that I succeeded in this Herculean task and managed to lift the cistern from its throne and lay it on its back. By gum, its no joke doing this job, as you lot had warned me. I had to use the Dremel diamond cutting disk to cut partway into the screw shank and then break off the shank with grips. That was the longest, most uncomfortable part of the job. I then removed the nuts attached to the screw shanks just outside of the cistern base, and pulled the old screws out. Made of brass No stainless steel in those days. Removing those nuts needed lots of WD-40.

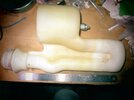
Next I unscrewed the doughnut seal retaining nut from the threaded exit tube of the syphon (together with its plumber's putty) and then pulled the syphon out of the cistern.
The syphon is a big ole' fella (IMG_9477). They sure made 'em man-sized in them old days. I then put in the new Dudley Turbo88 syphon into the cistern, extended out to 10" (the instruction leaflet says that the adjustment range is between 7.5" to 9.5", but the tube also has a 10" mark on it, which is the one I set it to). I noted straight away that the 1/2" BSP diameter of the Turbo88 exit tube is smaller than the 2.5" exit hole of the cistern. IMG_9489 shows the Turbo88 exit tube with its neoprene sealing washer. IMG_9488 shows this exit tube sticking out of the cistern exit hole, IMG_9487 shows the placement of a neoprene doughnut washer on the protruding syphon exit tube. And IMG_9486 shows the doughnut secured with the seal retaining washer of the Turbo88.
The washer seal of IMG_9489 barely covers the 2.5" cistern hole. but the doughnut completely covers it.

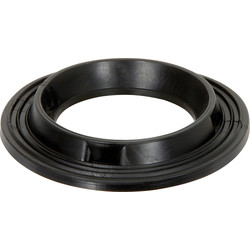
The doughnut came from the Screwfix item Denso provided in post #19, namely
This item also came with a steel fixing /retaining plate with two M5 machine screws. I have not used this plate coz' I have neither the space nor the two screwholes in the cistern for them (the plate is designed to be fitted in a modern cistern with TWO fixing holes. Mine has 4).

So my first question is: is this sealing arrangement adequate for the job or do I need to modify it? IMG_9478 is a shot of the cistern bottom with the Turbo88 syphon in place.

My next question concerns the copper cistern lever spindle. Photos IMG_9480 & IMG_9481 show this clearly. The spindle is too short for the Turbo88 syphon, so when the lever is pressed down, it stays down. I measured it and I need a 110mm spindle.

I tried loosening the spindle extension screw in OMG_9481, but both this screw and the one attached to the spindle lever's square bar are corroded /stuck in place. I was thinking of playing a microtorch such as https://www.ebay.co.uk/itm/26581731...t_ms=&gad_source=1&gad_campaignid=20506529270 on the extension arm's screw to loosen it but am wary of further damaging the cracked bushing hole in the cistern (IMG_9462). Your advice will be greatly appreciated! That's my second question.

 

Attachments

  • IMG_9477.JPG
    IMG_9477.JPG
    292.9 KB · Views: 8
  • IMG_9486.JPG
    IMG_9486.JPG
    332.1 KB · Views: 7
  • IMG_9487.JPG
    IMG_9487.JPG
    351.3 KB · Views: 6
  • IMG_9488.JPG
    IMG_9488.JPG
    341.3 KB · Views: 5
  • IMG_9489.JPG
    IMG_9489.JPG
    292.4 KB · Views: 6
  • IMG_9478.JPG
    IMG_9478.JPG
    411.9 KB · Views: 7
  • IMG_9480.JPG
    IMG_9480.JPG
    340 KB · Views: 7
  • IMG_9481.JPG
    IMG_9481.JPG
    424.7 KB · Views: 7
  • IMG_9462.JPG
    IMG_9462.JPG
    327.8 KB · Views: 8
Links in this post may contain affiliate links for which DIYnot may be compensated.
I have an answer to my first question of post #37. I need to use the following adapter seal from Toolstation
This is turned upside down from its position in the photo on the webpage, then the syphon's exit tube is inserted into it, then the exit tube is pushed out of the hole in the cistern, then the doughnut washer is put on this exit tube as in IMG_9487 of post #37, and then the retaining washer of the syphon exit tube is placed on the exit tube & tightened to effect the seal as shown in the attached photo IMG_9486.

I have confirmed this with Thomas Dudley's tech support (the syphon maker).

This now leaves my second question of post #37 to be answered. All help will be greatly appreciated.
 

Attachments

  • IMG_9486.JPG
    IMG_9486.JPG
    332.1 KB · Views: 4
I have an answer to my first question of post #37. I need to use the following adapter seal from Toolstation
This is turned upside down from its position in the photo on the webpage, then the syphon's exit tube is inserted into it, then the exit tube is pushed out of the hole in the cistern, then the doughnut washer is put on this exit tube as in IMG_9487 of post #37, and then the retaining washer of the syphon exit tube is placed on the exit tube & tightened to effect the seal as shown in the attached photo IMG_9486.

I have confirmed this with Thomas Dudley's tech support (the syphon maker).

This now leaves my second question of post #37 to be answered. All help will be greatly appreciated.

How's that going to work then?
Because you need a backing nut on the other side that will fit the thread on the dump valve AND cover the 2.5" hole in the cistern!
Should have just gone and bought yourself a bog-in-a-box and had less hassle!
 
How's that going to work then?
Because you need a backing nut on the other side that will fit the thread on the dump valve AND cover the 2.5" hole in the cistern!
Should have just gone and bought yourself a bog-in-a-box and had less hassle!

But what do I know!
I'm just a hairy arse plumma!

:rolleyes:;)
 
How's that going to work then?
Because you need a backing nut on the other side that will fit the thread on the dump valve AND cover the 2.5" hole in the cistern!
Should have just gone and bought yourself a bog-in-a-box and had less hassle!
I now agree with you. But It was an educational experience removing the cistern from the pan.

Right, what do I need to do to remove the old commode and install the new one? I will prob'ly order this one:
What must I do (1) to remove the old commode, and (2) Install the new one, particularly with regard to the sewer pipe connection.

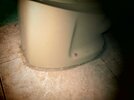
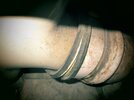
EDIT: I've uploaded two photos of the existing pan. In IMG_9496 we can see a rusted fixing screw at the base of the pan. There's another one on the other side. Presumably these must be unscrewed and removed. In IMG_9497, which is of the sewer connection, I am presuming that once the pan fixing screws are removed, we can lift the pan clear of the sewer pipe (with some water spillage). To install the new pan we simply put the new pan in place of the old one, slipping its sewer connection into the old sewer hole and then screw in the new pan into the floor. Are these steps correct? Have I omitted any step, such as getting new sewer hole seals? Thanks in advance!
 

Attachments

  • IMG_9496.JPG
    IMG_9496.JPG
    299.3 KB · Views: 1
  • IMG_9497.JPG
    IMG_9497.JPG
    365.3 KB · Views: 1
Last edited:

If you need to find a tradesperson to get your job done, please try our local search below, or if you are doing it yourself you can find suppliers local to you.

Select the supplier or trade you require, enter your location to begin your search.


Are you a trade or supplier? You can create your listing free at DIYnot Local

 
Back
Top