Well this has been going on for <cough> "some time" - good job he's not having to live in it yet 
Anyway, been meaning to post some pics up after asking for help in the tiling forum, so here goes - starting with the bathroom. Sadly, we were a bit remiss in taking "before" photos which would have been nice if we'd done it.
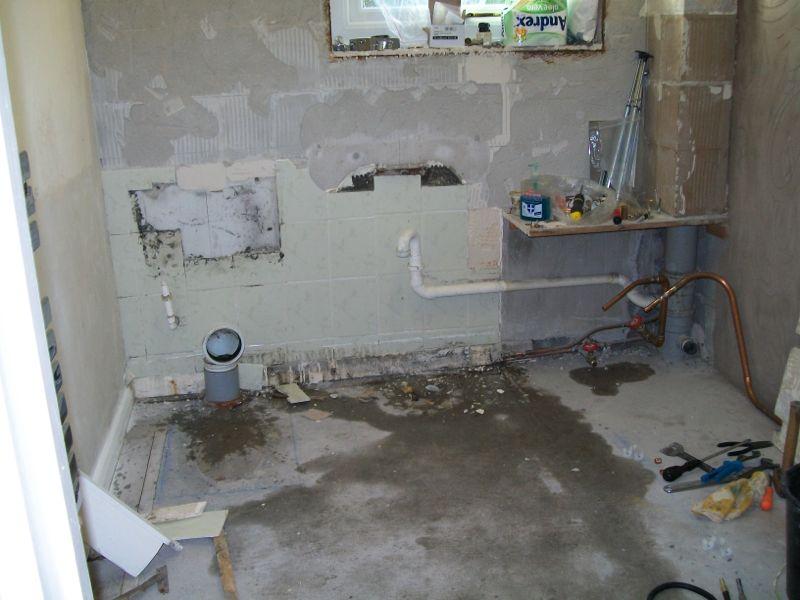
To start with, I happened to take some photos as we took the Aquability walk in shower out. I mostly took these so I could see later how it went together as it was given to a relative who might use it (or might not). As you can see, when they fit these, they just pull the bath out and cover up whatever is already on the walls. My mate took an instant dislike to that lovely green suite - I really can't understand why !
By this stage, he'd had the side wall rendered as most of the plaster fell off when we were taking the tiles off. Here we have put the bath in to see how it's going to fit for length and width.
By this stage, you can just see on the left that we've fitted the chrome towel rail - and we've reached the point of no return by taking out the toilet. Cue the old joke where the comic TV newsreader reads the news "Thieves last night broke into the local Police Station and stole the toilets. The Police say they have nothing to go on"
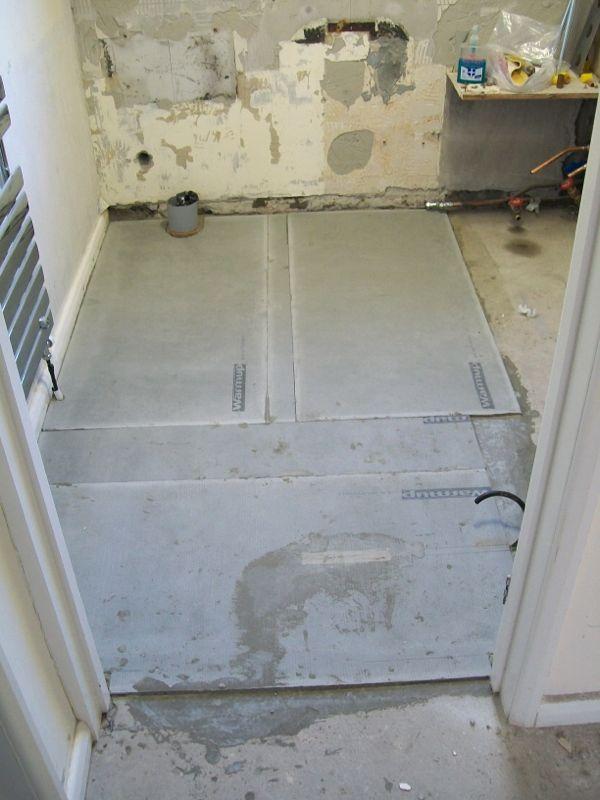
The insulation board for the UFH is down.
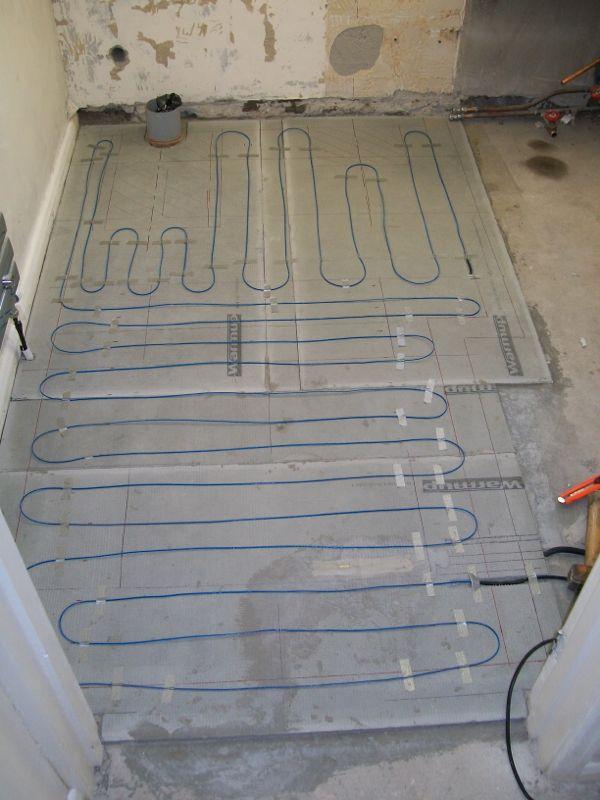
Followed by the heater wire (yes there is the sensor pocket fitted).
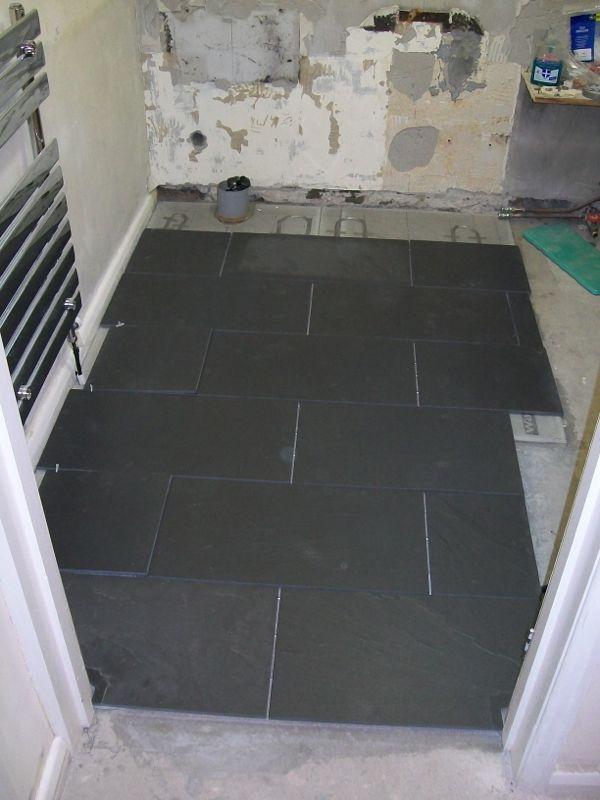
A trial layout of the tiles.
And now skipping forward a bit - mostly because I don't really want to admit to all the "learning experiences" - we are to the point of fitting the new toilet. The floor is laid and grouted (at least the area around the toilet), and the back wall is tiled as far as we need it at this point. In hindsight we should have had the back wall skimmed flat as well - it was "a bit of a job" tiling it and the tiles aren't as flat as I'd have liked to have done them.
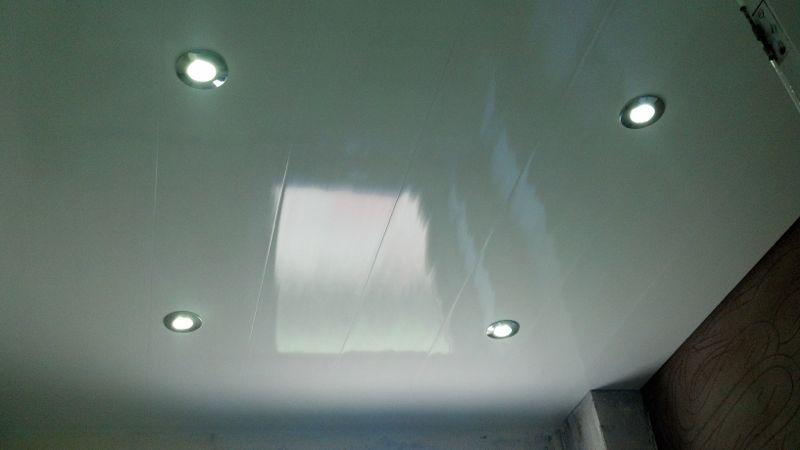
Around this point, my mate got someone else in to install the ceiling cladding and lights - and also connect up the UFH (as that's notifiable). Those are Haler H2 7W dimmable lights.
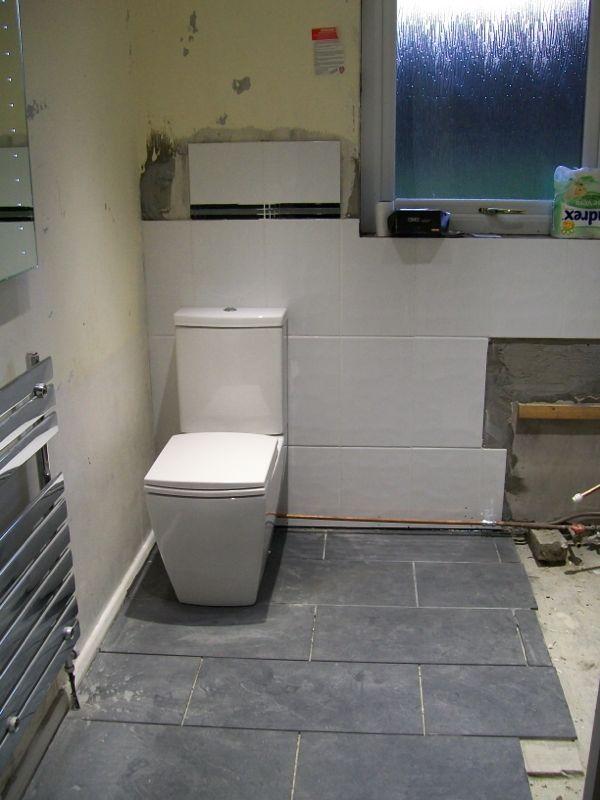
Toilet installed, and the bright lights show up all the dirt !
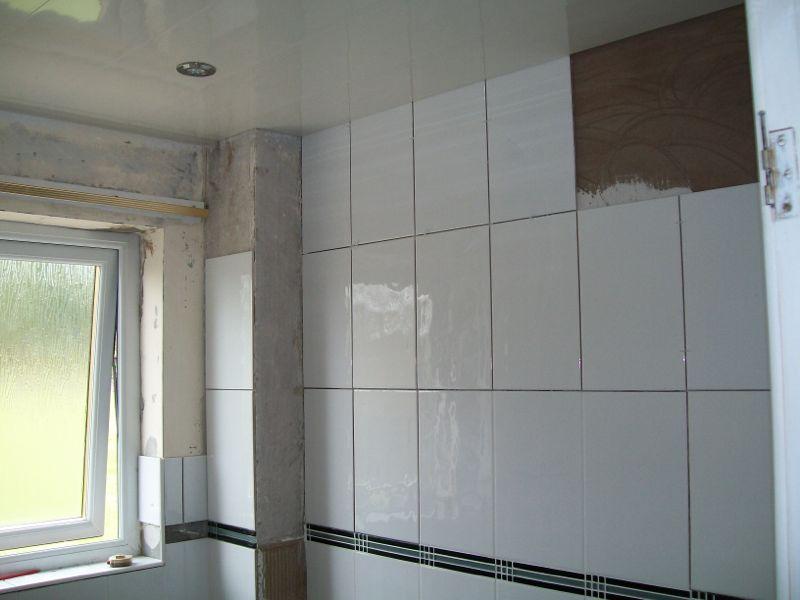
By now the tiling has reached the ceiling. I'd spent some time working out the arrangement, vertically I'd arranged for just under half a tile height above the bath (more about that later), and just under a full tile height at the ceiling.
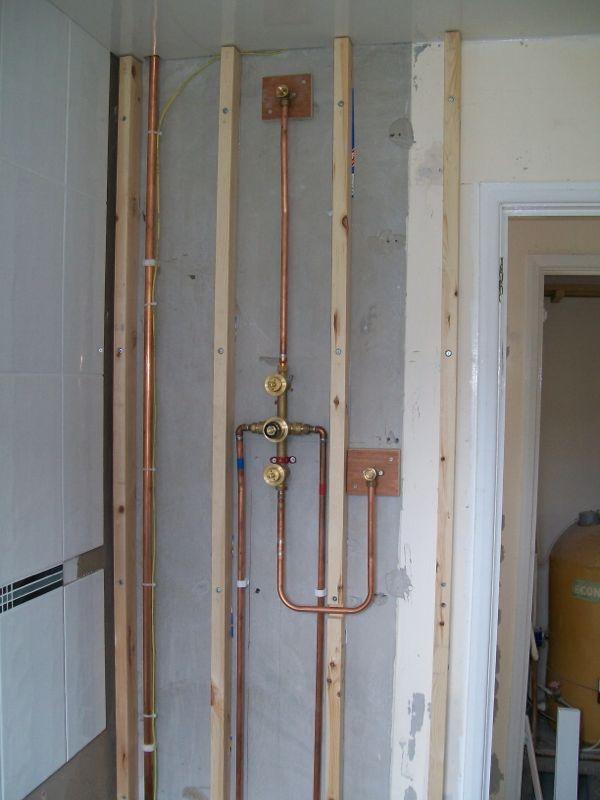
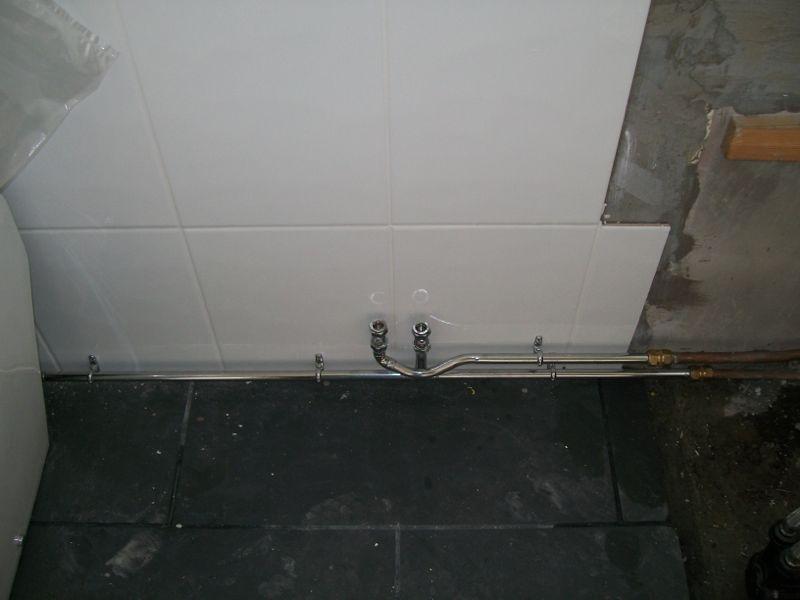
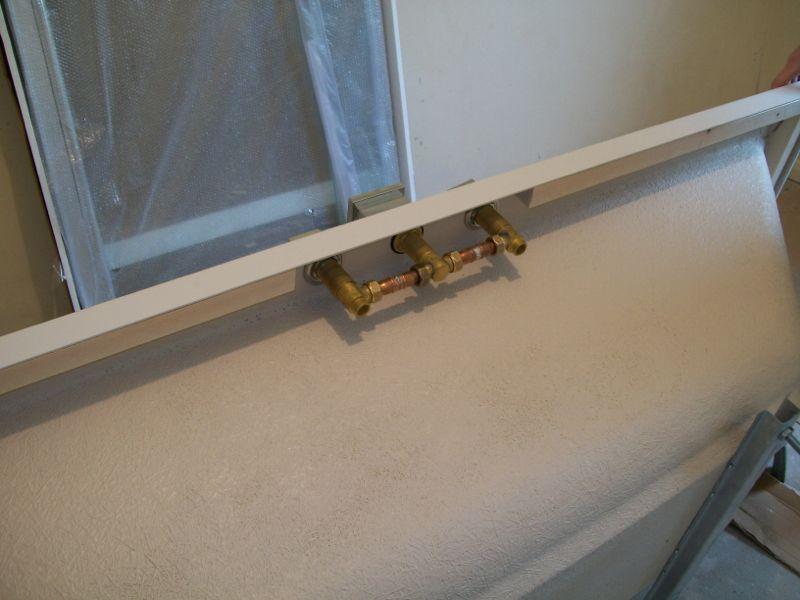
At the shower end, we'd battened out the wall, and here is the plumbing fitted for the shower. Needless to say, the fittings were designed to be fitted from behind in a stud wall - so here I've very carefully packed everything out so that things will fit 'just right' once the tiling is done.
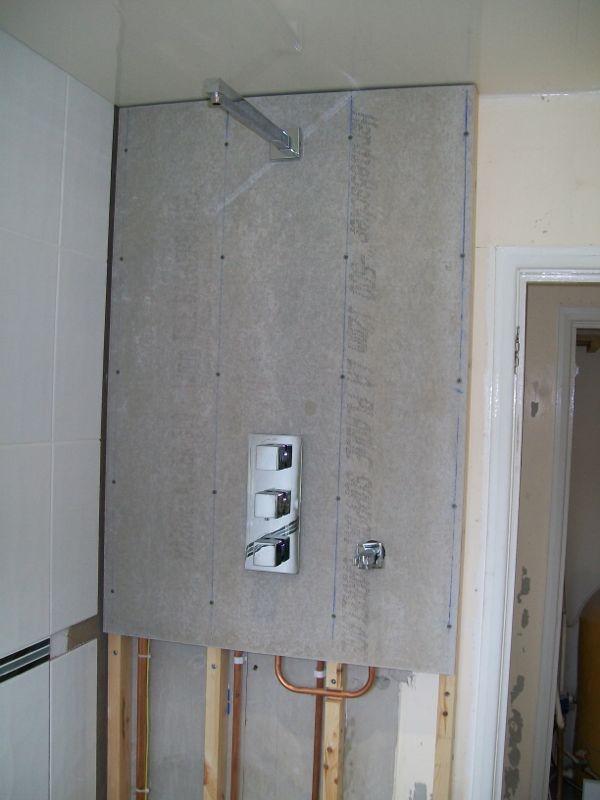
Here the backer board is fitted, and a trial fit of the fittings to double check that they are all the right distance off the board to allow for the tiles.
Once we'd got all the pipework done, we couldn't resist seeing how the shower ran - spilling a certain amount of water in the process The pump will be hidden under the head of the bath, but will be accessible by removing the panel.
I spent "a bit of time" practicing on some scrap pipe before doing this little crossover in chrome. Though I say so myself, I'm quite happy with how it turned out.
Here the tiling is going on the shower end. I quickly learned (earlier on) that it's easier to leave a gap and fit the borders afterwards. The best thing about this tiling was that since it was my mates place, I could leave him to do the grouting
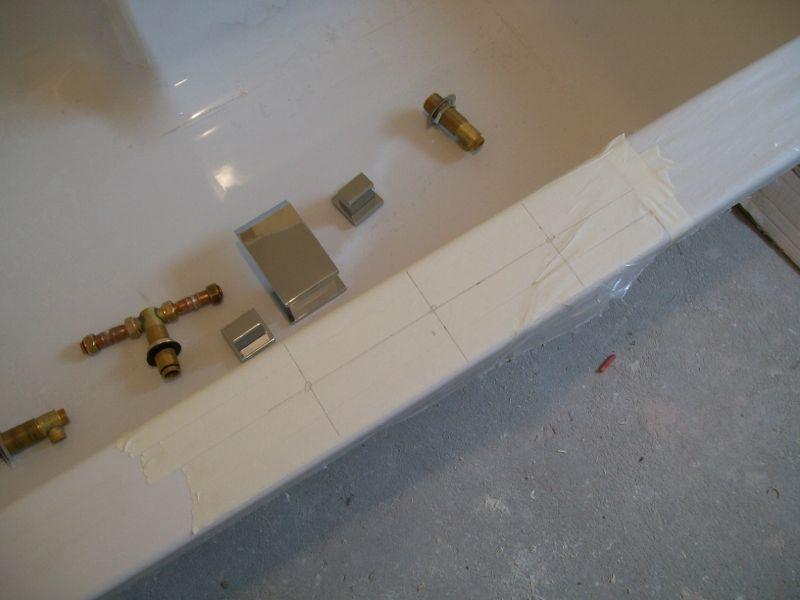
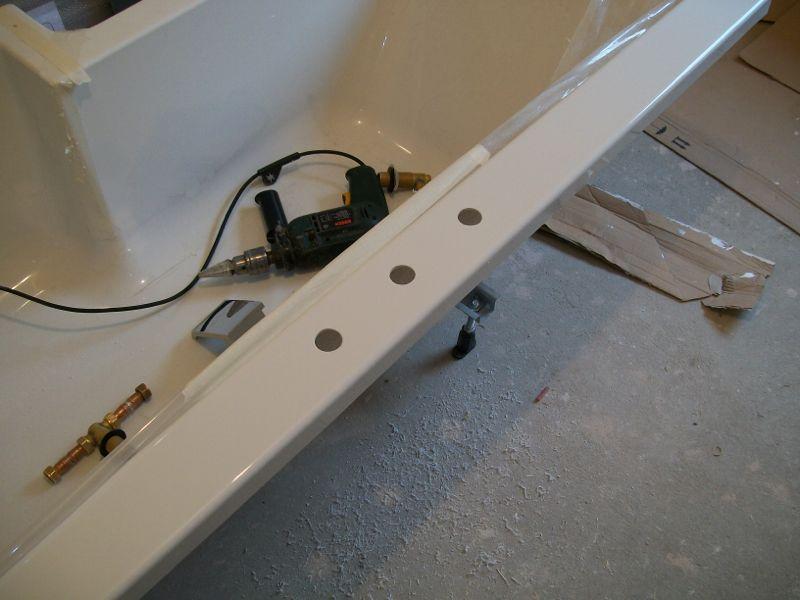
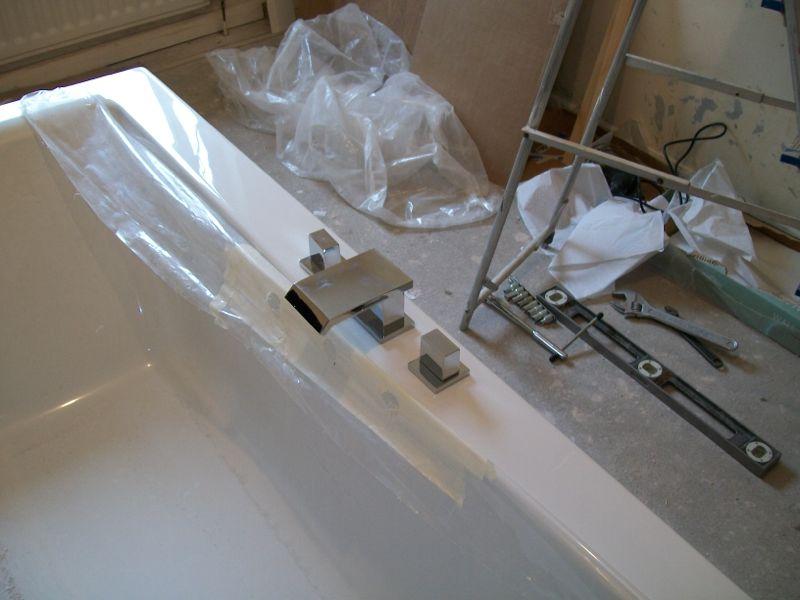
Now we get to fitting the bath taps. This was definitely a case of measure twice, and again, and again ! Then finally take the plunge and cut holes in his brand new bath.
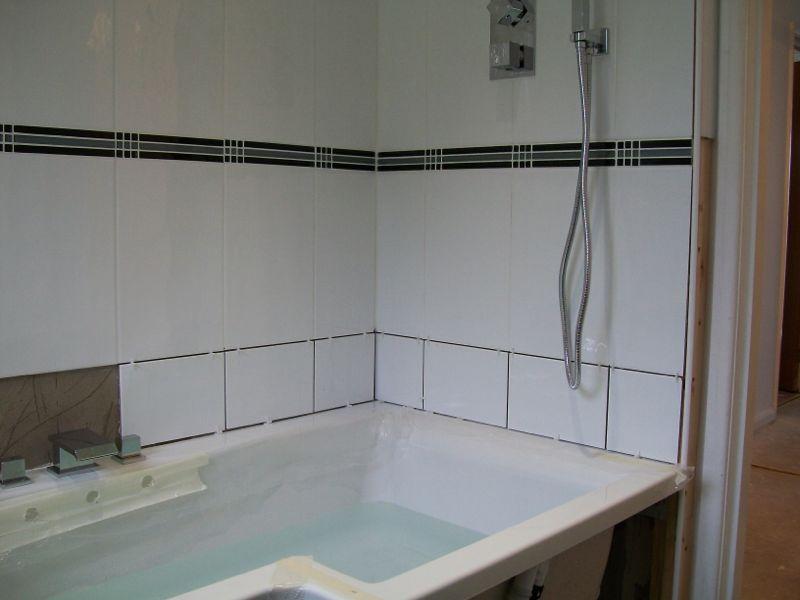
Here the bath is fitted, fixed in place, filled with water, and the bottom row of tiles is going in. By making this bottom row just under half a tile, it made them easy to handle while leaning across the bath.
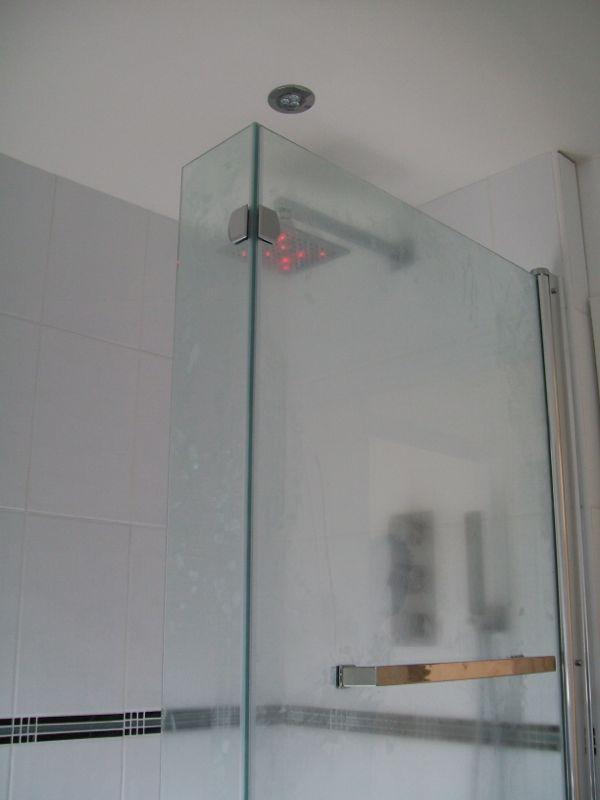
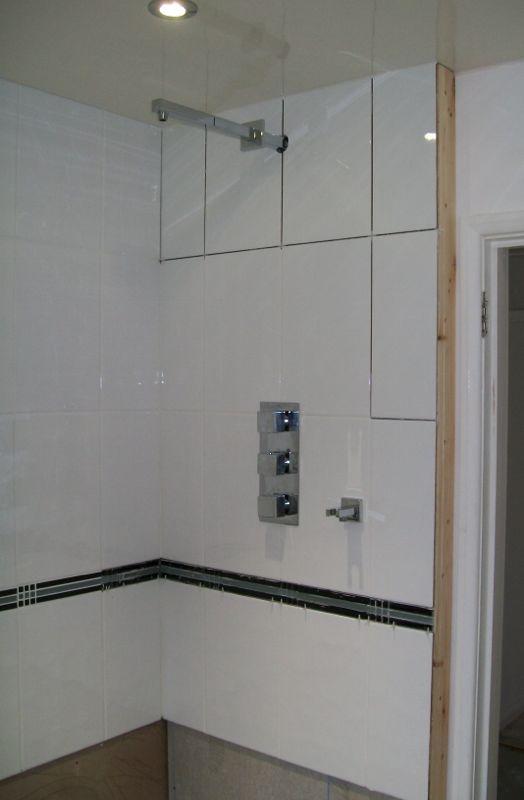
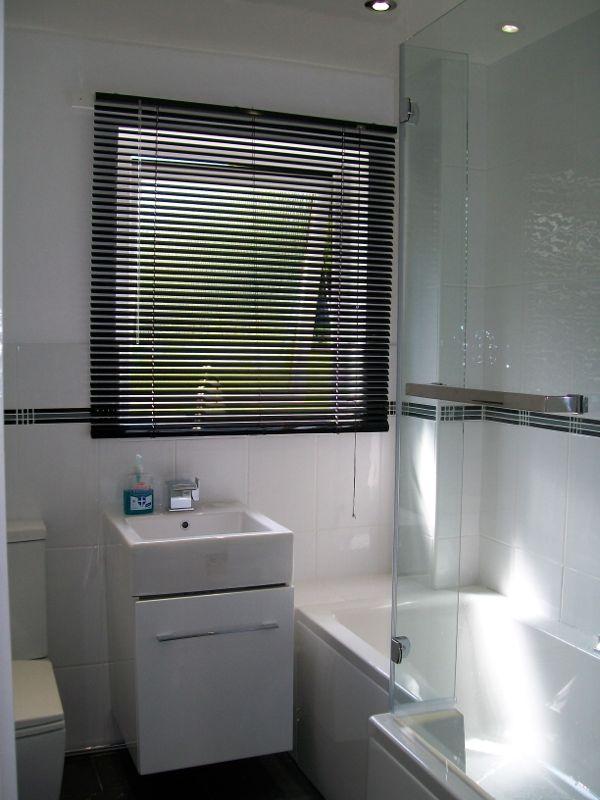
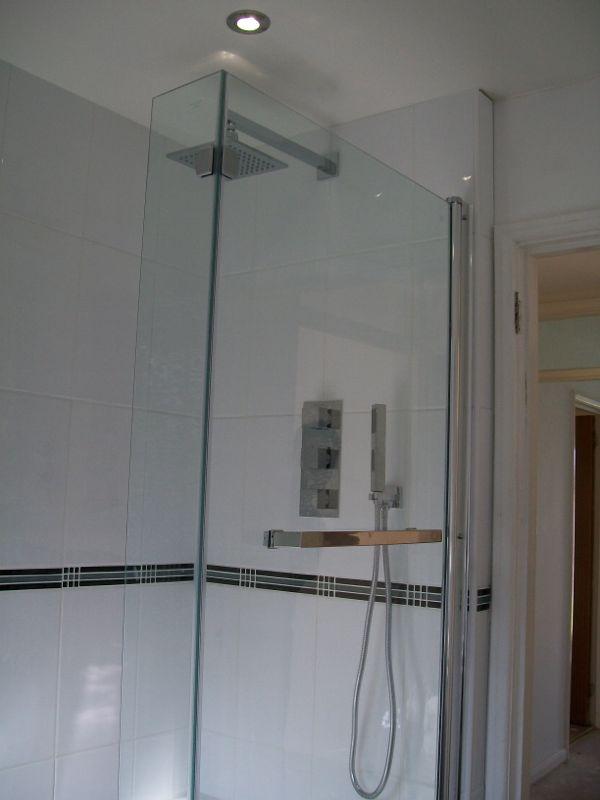
And the final result. As you may have gathered, my friend's taste is square, black and white, and chrome.
And when running, the shower head lights up. The LEDs change colour with temperature - blue for cold, green for OK, red for hot, and flashing red for "flipping 'eck that's hot".
Anyway, been meaning to post some pics up after asking for help in the tiling forum, so here goes - starting with the bathroom. Sadly, we were a bit remiss in taking "before" photos which would have been nice if we'd done it.
To start with, I happened to take some photos as we took the Aquability walk in shower out. I mostly took these so I could see later how it went together as it was given to a relative who might use it (or might not). As you can see, when they fit these, they just pull the bath out and cover up whatever is already on the walls. My mate took an instant dislike to that lovely green suite - I really can't understand why !

By this stage, he'd had the side wall rendered as most of the plaster fell off when we were taking the tiles off. Here we have put the bath in to see how it's going to fit for length and width.

By this stage, you can just see on the left that we've fitted the chrome towel rail - and we've reached the point of no return by taking out the toilet. Cue the old joke where the comic TV newsreader reads the news "Thieves last night broke into the local Police Station and stole the toilets. The Police say they have nothing to go on"
The insulation board for the UFH is down.
Followed by the heater wire (yes there is the sensor pocket fitted).
A trial layout of the tiles.
And now skipping forward a bit - mostly because I don't really want to admit to all the "learning experiences"
- we are to the point of fitting the new toilet. The floor is laid and grouted (at least the area around the toilet), and the back wall is tiled as far as we need it at this point. In hindsight we should have had the back wall skimmed flat as well - it was "a bit of a job" tiling it and the tiles aren't as flat as I'd have liked to have done them.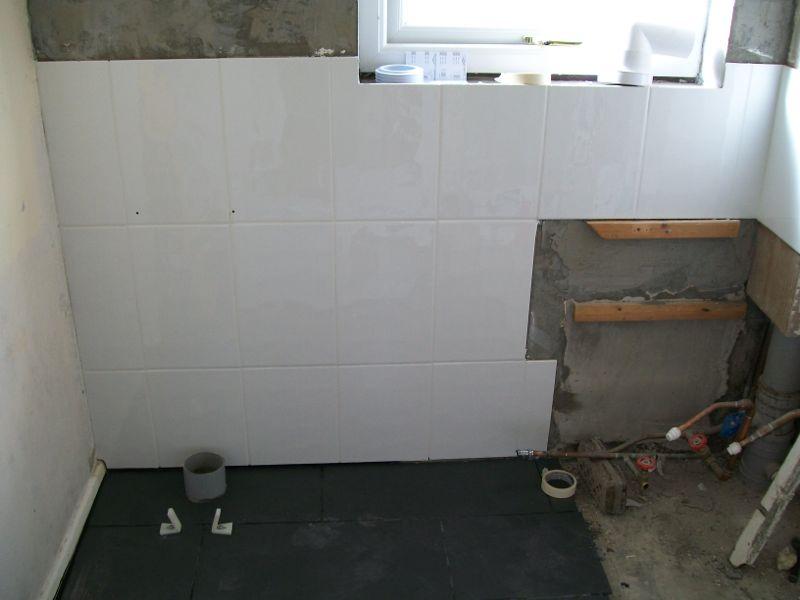
Around this point, my mate got someone else in to install the ceiling cladding and lights - and also connect up the UFH (as that's notifiable). Those are Haler H2 7W dimmable lights.
Toilet installed, and the bright lights show up all the dirt !
By now the tiling has reached the ceiling. I'd spent some time working out the arrangement, vertically I'd arranged for just under half a tile height above the bath (more about that later), and just under a full tile height at the ceiling.
At the shower end, we'd battened out the wall, and here is the plumbing fitted for the shower. Needless to say, the fittings were designed to be fitted from behind in a stud wall - so here I've very carefully packed everything out so that things will fit 'just right' once the tiling is done.
Here the backer board is fitted, and a trial fit of the fittings to double check that they are all the right distance off the board to allow for the tiles.
Once we'd got all the pipework done, we couldn't resist seeing how the shower ran - spilling a certain amount of water in the process
The pump will be hidden under the head of the bath, but will be accessible by removing the panel.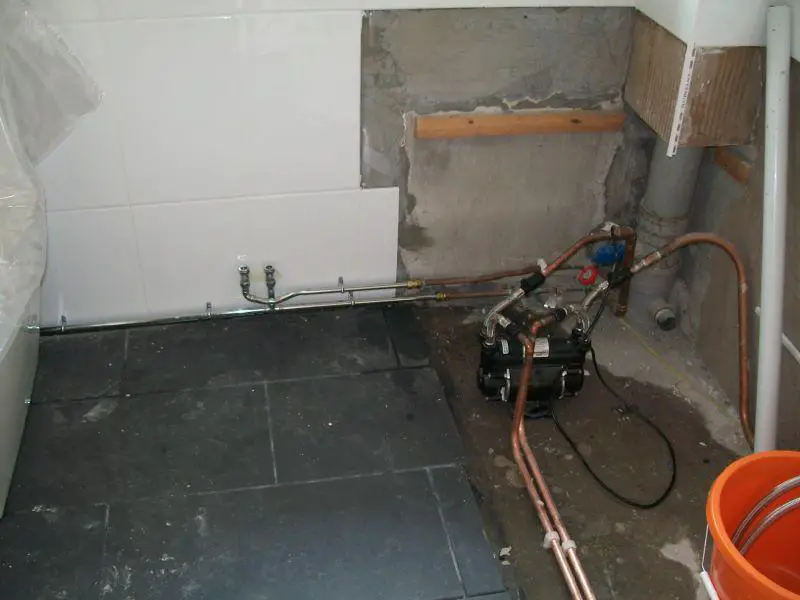
I spent "a bit of time" practicing on some scrap pipe before doing this little crossover in chrome. Though I say so myself, I'm quite happy with how it turned out.
Here the tiling is going on the shower end. I quickly learned (earlier on) that it's easier to leave a gap and fit the borders afterwards. The best thing about this tiling was that since it was my mates place, I could leave him to do the grouting

Now we get to fitting the bath taps. This was definitely a case of measure twice, and again, and again ! Then finally take the plunge and cut holes in his brand new bath.
Here the bath is fitted, fixed in place, filled with water, and the bottom row of tiles is going in. By making this bottom row just under half a tile, it made them easy to handle while leaning across the bath.
And the final result. As you may have gathered, my friend's taste is square, black and white, and chrome.
And when running, the shower head lights up. The LEDs change colour with temperature - blue for cold, green for OK, red for hot, and flashing red for "flipping 'eck that's hot".