Replacing a ceiling rose

Joined
25 Feb 2012
Messages
52
Reaction score
0
Location
Middlesex
Country
United Kingdom
I've bought a pendant light and it has different wiring to the old one, the new one using a terminal block inside the metal housing. I've done some research into how to change over the wiring, but wanted to run it past the experts on here to make sure my understanding is correct.

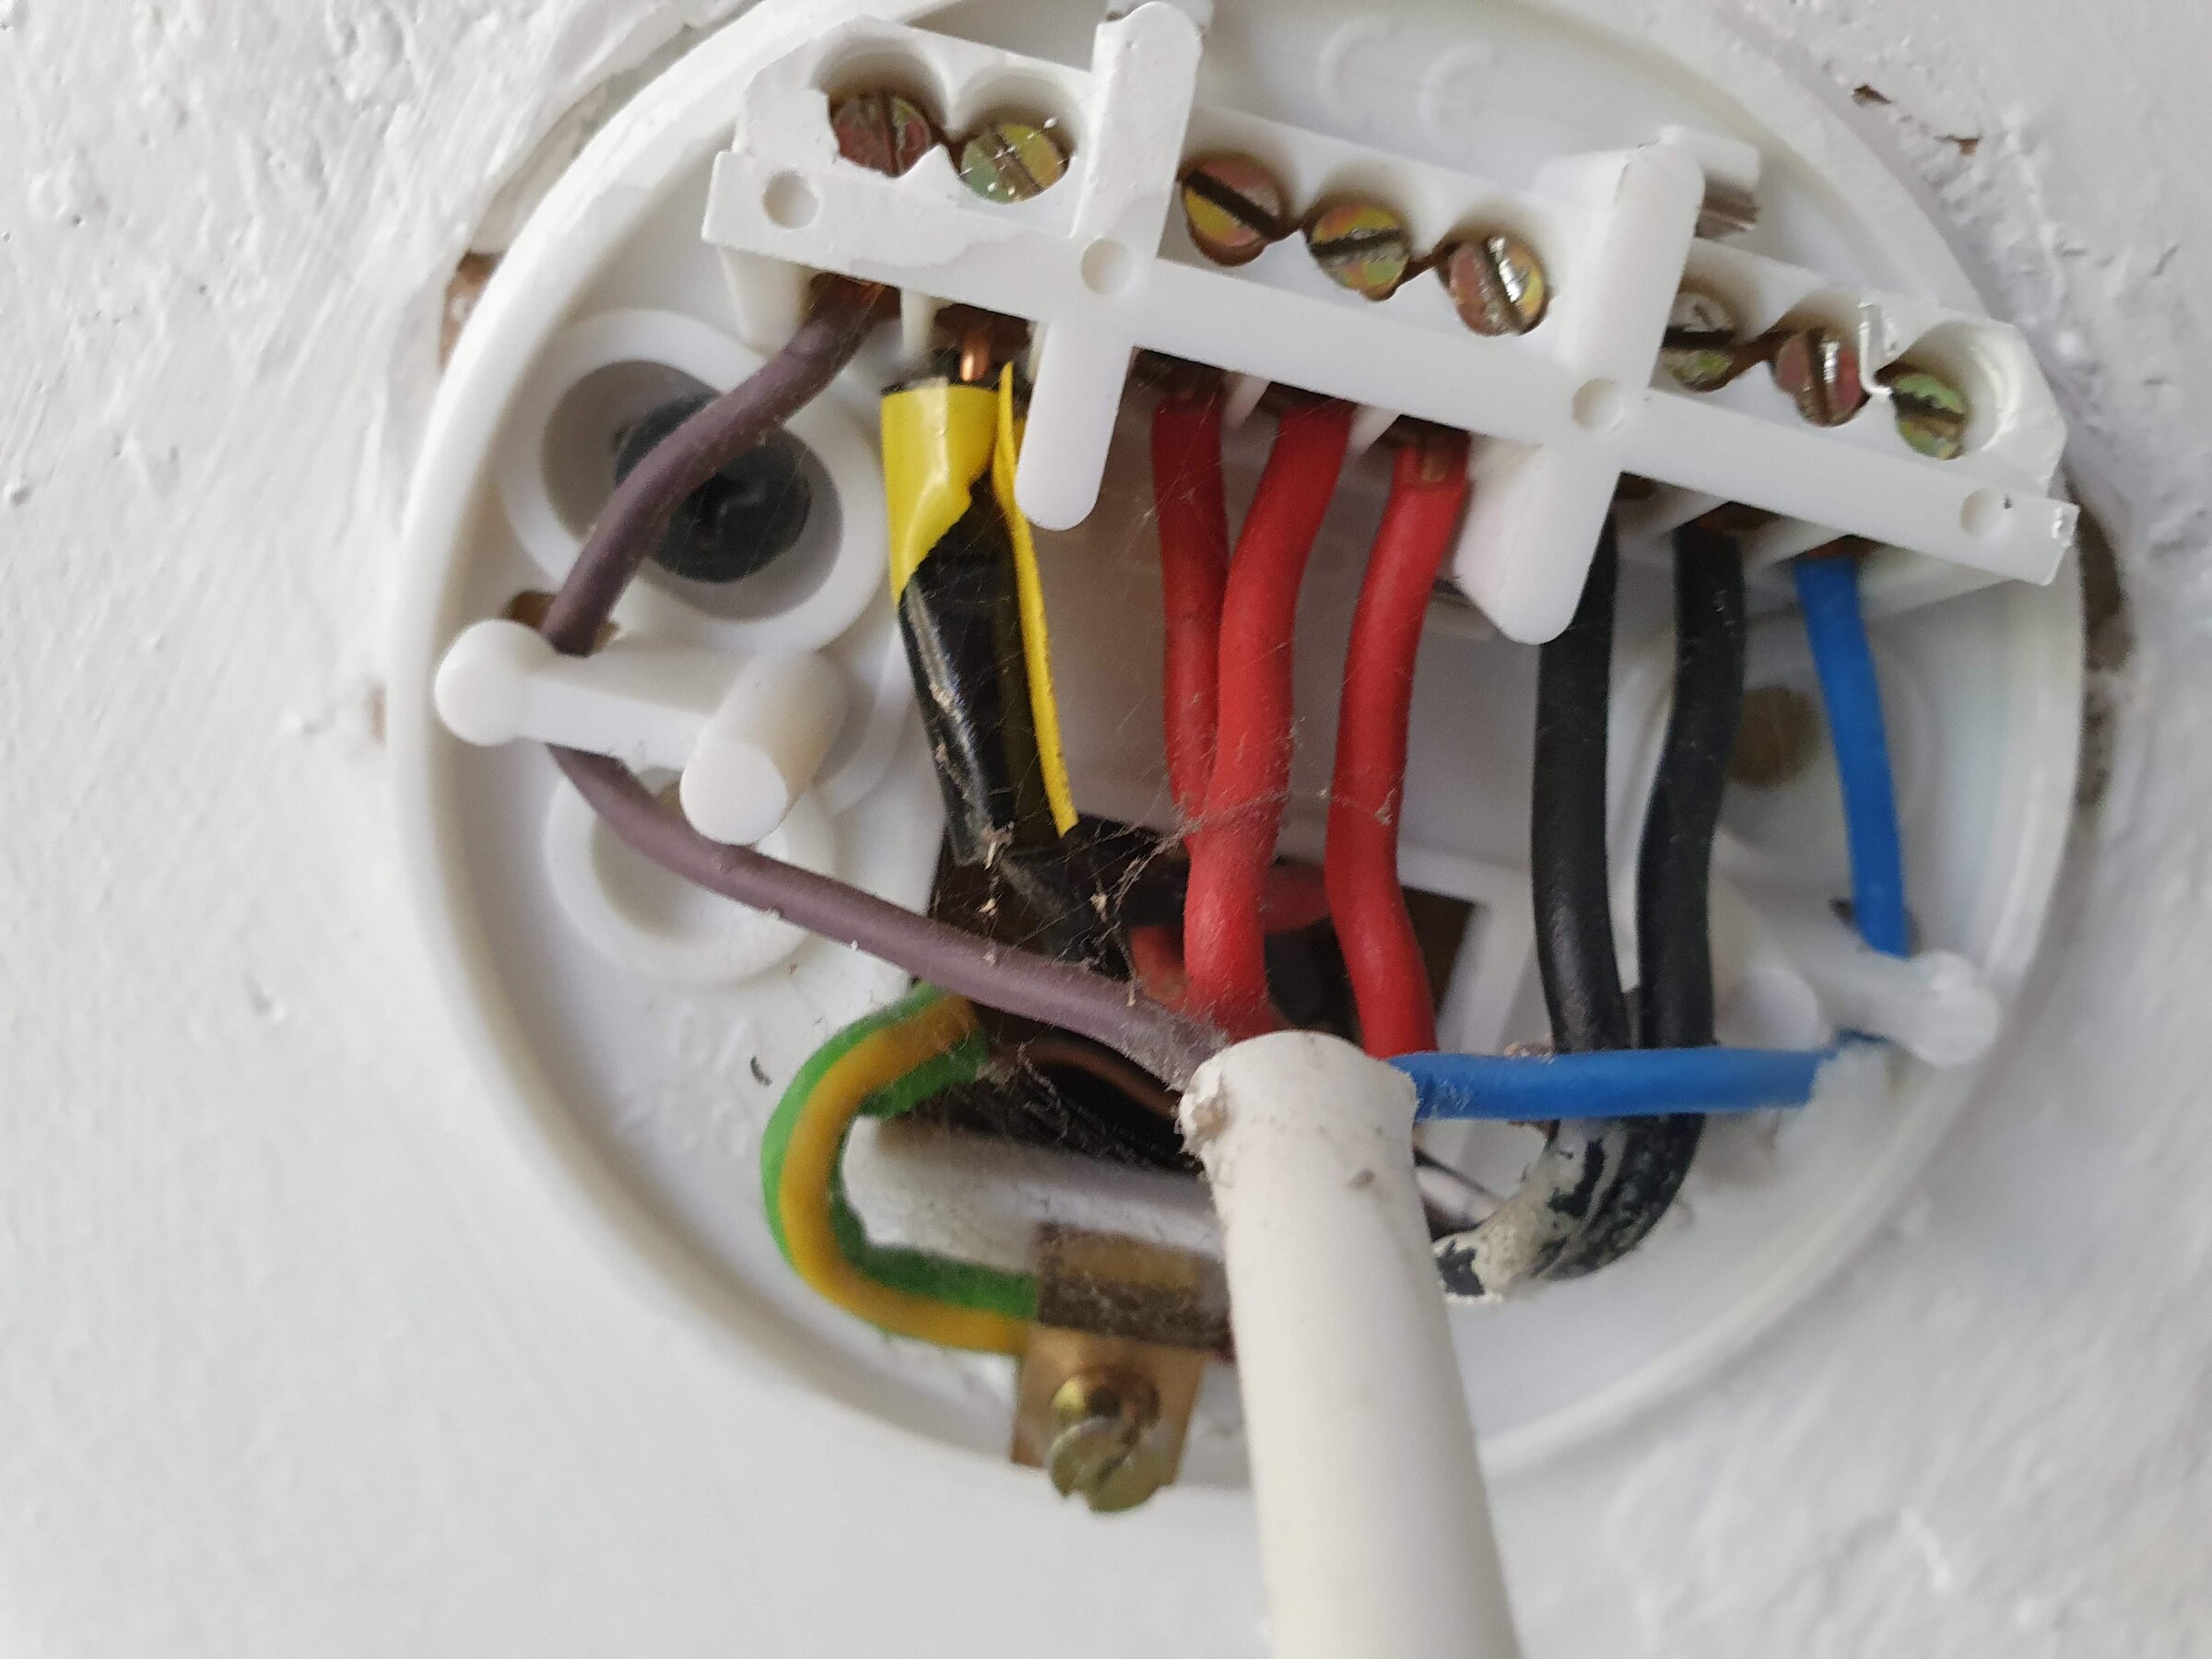
This is the old ceiling rose:


It's not clear from the pic, but three earth wires go into that one visible sleeve. Also, I assume that the wire with the black and yellow sleeve is the switched live.

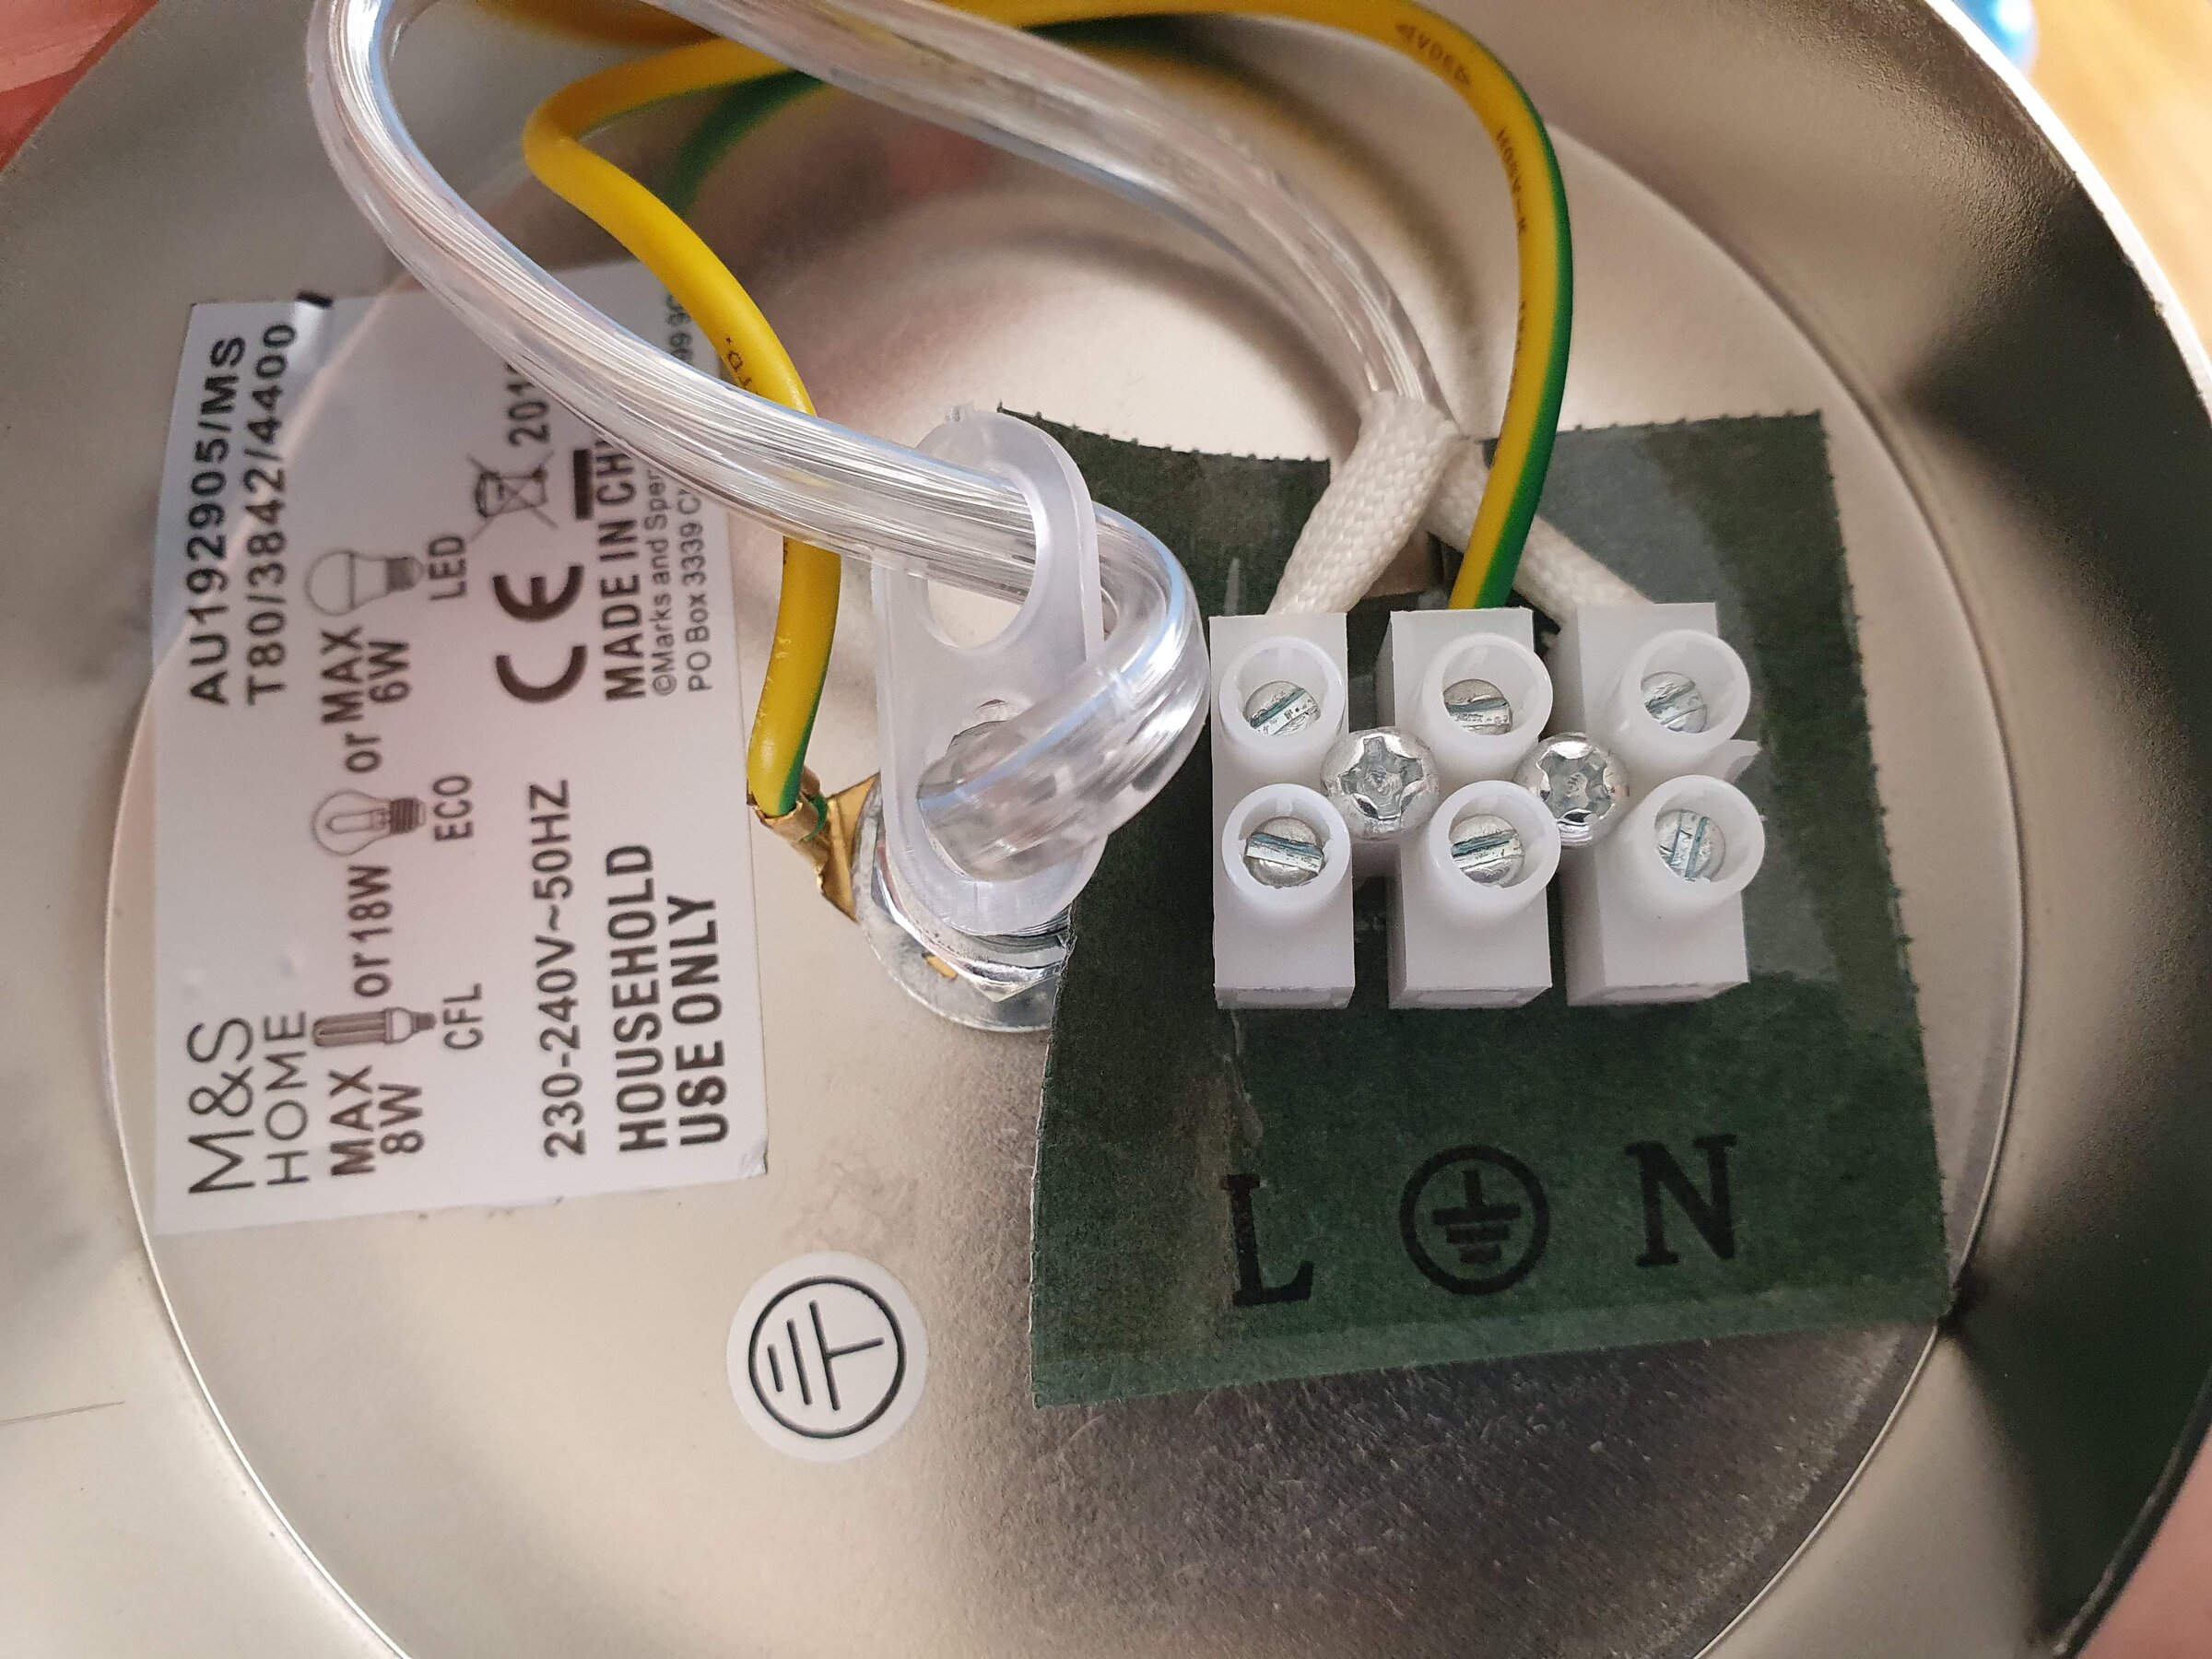
This is the new one:


I think I need to do the following:

1. After switching off the electricity supply, disconnect the wiring from the old rose backing plate, remove it and replace with the metal bar that came with the new light - this will hold the new rose in place.
2. Connect the switched live wire to the live connector in the new terminal block.
3. Connect the three earth wires (in the single sleeve) to the earth connector in the terminal block.
4. Connect the two neutral wires (black sleeves) to the neutral connector in the terminal block.
5. Do something with the three red-sleeved live wires. This is where I'm unclear. Should I buy a 3-connection Wago terminal block and secure them in that? If so, is it OK to just leave that loose inside the new light's housing? It looks big enough for that.

Thanks.
 
Sponsored Links
You are correct in how to connect it, and yes the reds are connected together but not to the fitting, either a wago or connector block is fine as long as its in the base of the light (do not poke it up into the roof void)

Because of the length of the cables (unless there is slack available) and the position of the connector block in the fitting, then because it looks like the base is quite deep, I'd connect short lengths of L N and E onto the fitting on the ground, and then make all of the connections in connectors or wagos and then connect the flying leads from the fitting and hang it up.

If you use a wago for the earths, remember to separate them out, invidually sleeve them and put them in separatate terminals on the wago, you shouldn't put more than one wire in each terminal on it. Wagos are available in 2, 3 and 5. Or just use connector block.

When you are connecting the fitting, I find it usful to use a bit of scrap cable threaded through the mounting holes in the fitting and the bracket and tied off, the fitting will hang there while you work, when conencted, snip it, pull it out and then secure the fitting to the bracket in the normal way
 
Isn't it about time ceiling light manufacturers started making their products compatible with actual ceiling roses? Changing a light fitting has got to be the most common electrical DIY job there is. Why not fit larger terminals with better screws; extra terminals for the loop wires and a little more room for everything?
 
Sponsored Links
Isn't it about time ceiling light manufacturers started making their products compatible with actual ceiling roses? Changing a light fitting has got to be the most common electrical DIY job there is. Why not fit larger terminals with better screws; extra terminals for the loop wires and a little more room for everything?

Probably because other countries don't use the ceiling rose as a junction box. It would cost more to make a special version for the UK.
 
You are correct in how to connect it, and yes the reds are connected together but not to the fitting, either a wago or connector block is fine as long as its in the base of the light (do not poke it up into the roof void)

Because of the length of the cables (unless there is slack available) and the position of the connector block in the fitting, then because it looks like the base is quite deep, I'd connect short lengths of L N and E onto the fitting on the ground, and then make all of the connections in connectors or wagos and then connect the flying leads from the fitting and hang it up.

If you use a wago for the earths, remember to separate them out, invidually sleeve them and put them in separatate terminals on the wago, you shouldn't put more than one wire in each terminal on it. Wagos are available in 2, 3 and 5. Or just use connector block.

When you are connecting the fitting, I find it usful to use a bit of scrap cable threaded through the mounting holes in the fitting and the bracket and tied off, the fitting will hang there while you work, when conencted, snip it, pull it out and then secure the fitting to the bracket in the normal way

Thanks, that's really helpful info. I've ordered some Wago blocks so I'll have the option of using those as you describe if there isn't enough slack.
 
I'm finally tackling this job today. I've removed the fuse for the lighting circuit and checked the light no longer comes on. However, I'd like to use my multimeter to confirm the circuit is dead. I've looked at a few YouTube videos showing how to use these things and find it all a bit confusing.

Here's a photo of the multimeter:


Could anyone tell me exactly: (1) what settings I should use on the dial and the slider at the top; (2) what I should touch with the red and black probes to check for electricity?

Thanks.
 
If that's all you have got, then the top slide switch is set at AC Volts - the left position where it is now.
The rotary one to 500V.

Probes to every pair of terminals in the ceiling rose:
earth & L
earth & N,
earth & switched L
L and switched L
L and N
N and switched L

There should be no reading for any of those combinations.

The meter should also be used on a known live supply to confirm it's working and does actually show the voltage.
 

DIYnot Local

Staff member

If you need to find a tradesperson to get your job done, please try our local search below, or if you are doing it yourself you can find suppliers local to you.

Select the supplier or trade you require, enter your location to begin your search.


Are you a trade or supplier? You can create your listing free at DIYnot Local

 
Sponsored Links
Back
Top