Replacing a Salus iT500 RX with3rd Gen NEST and Worcester 30CDi conventional boiler

Joined
11 May 2020
Messages
9
Reaction score
1
Country
United Kingdom
Hello, my Salus wi-fi Gateway has finally died and it's time to replace the unreliable system with a Nest.

Could anyone advise on wiring the Nest heatlink to replace the iT500 RX receiver unit please?

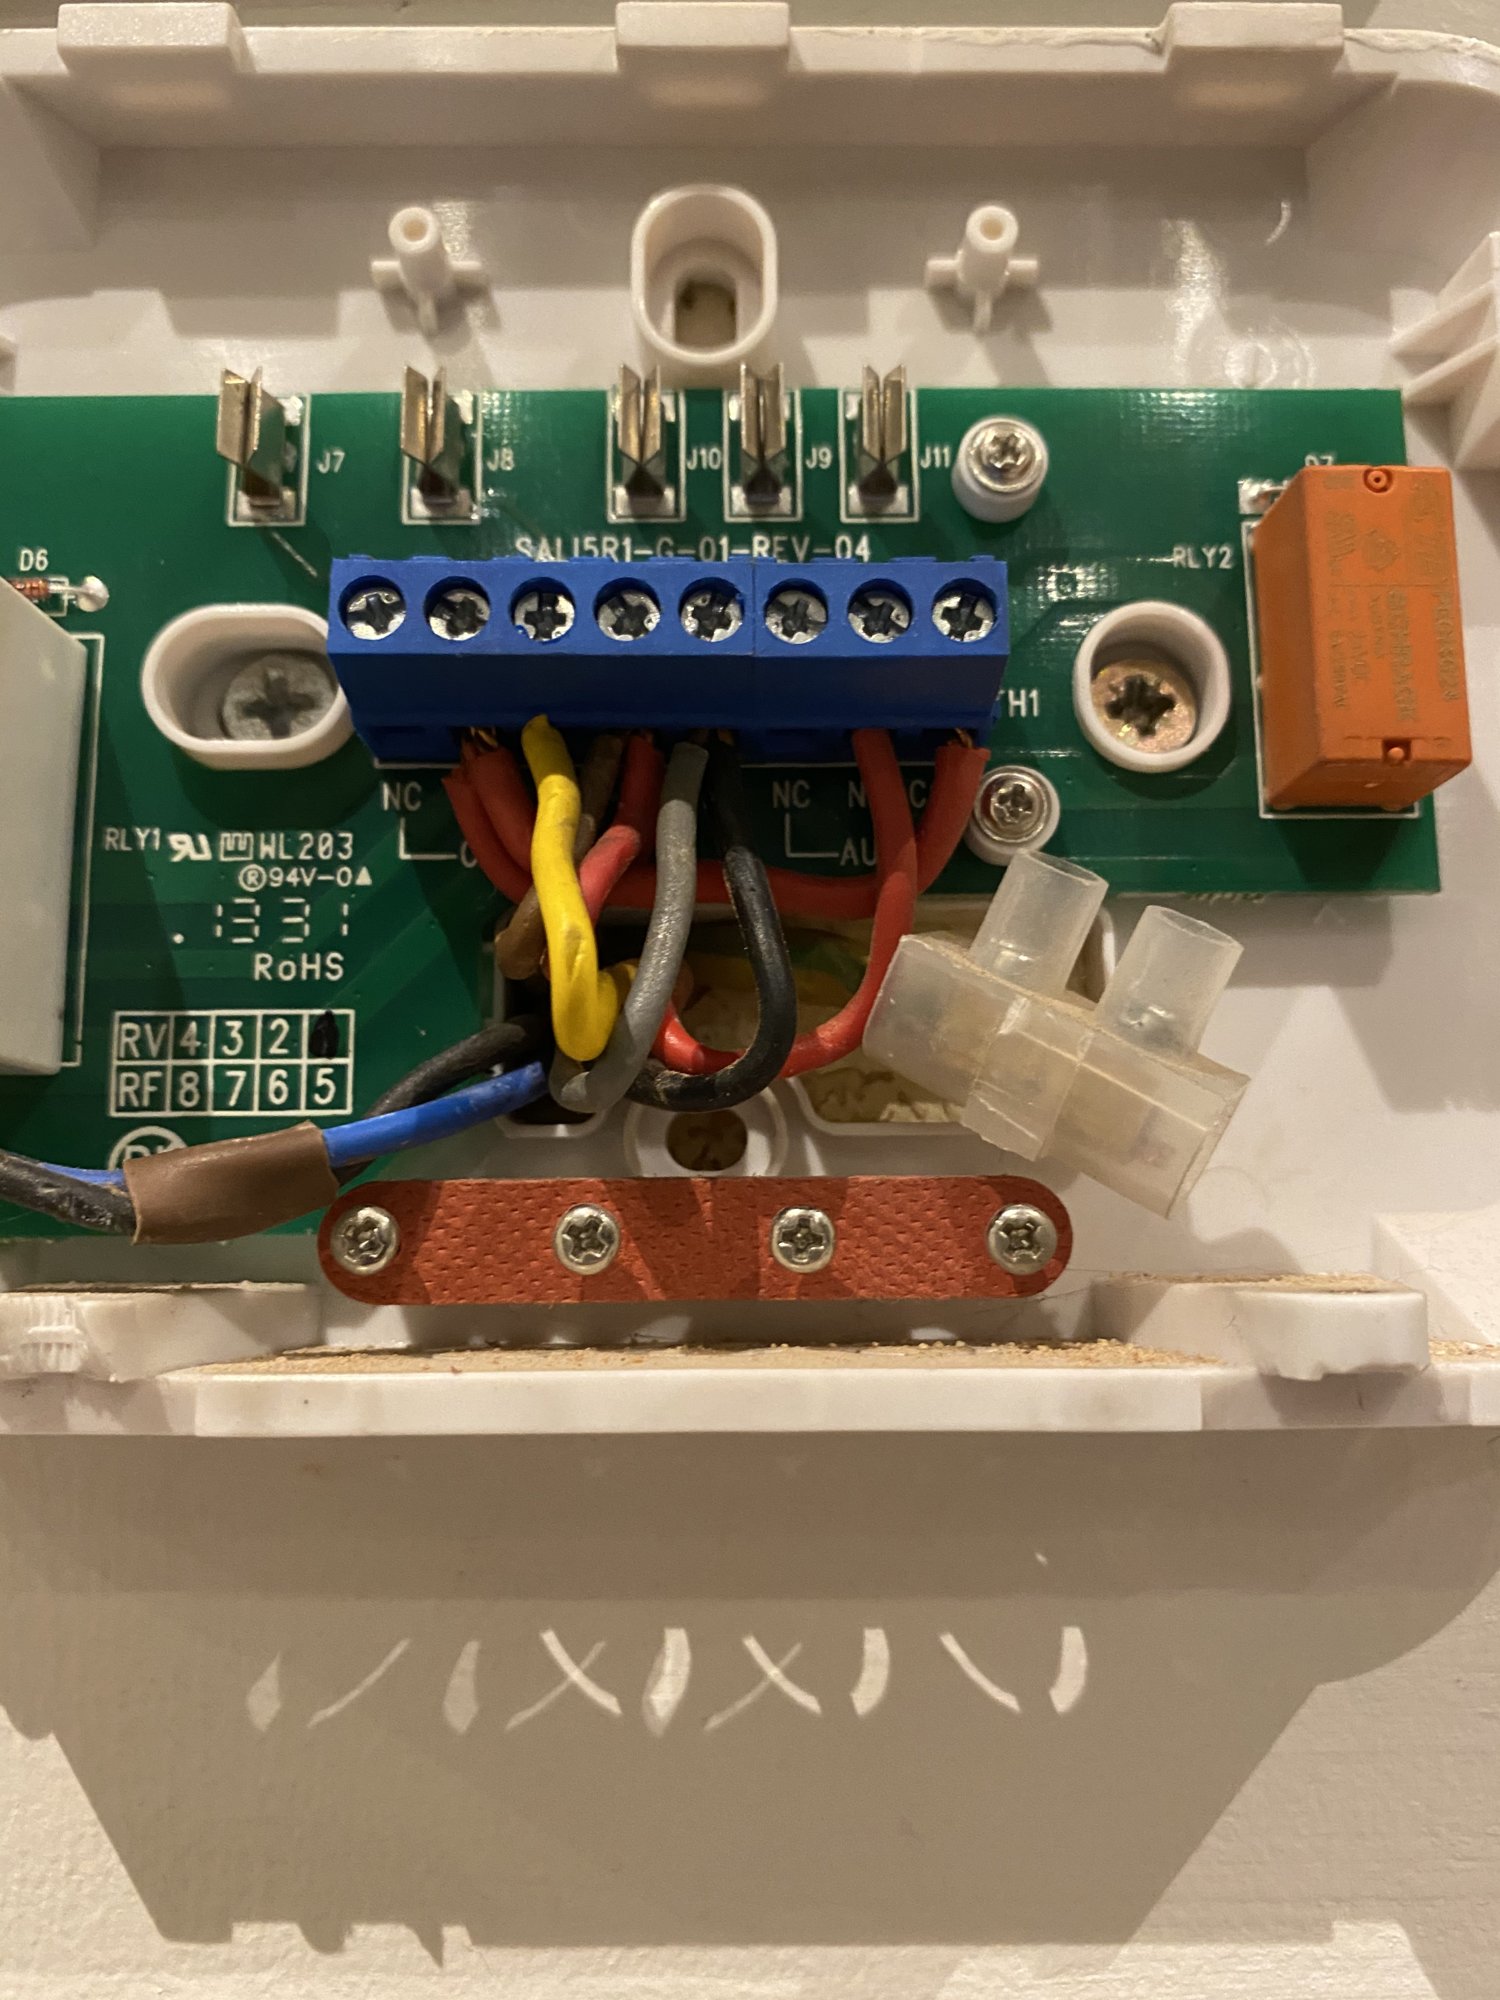
The current wiring is as per the images attached, as follows:

1. Red cable from CH COM to CH L
2. Red cable from CH COM to AUX COM
3. Yellow cable from wall to CH NO
4. Brown cable from wall to CH L
5. Red cable from wall to CH L
6. Grey cable from wall to N
7. Black cable from wall to N
8. Red cable from wall AUX NO

And then there are terminated black and blue cables and a separate terminated earth. I assume these can remain or the earth can be connected to the heatlink earth.

Am I correct in the following for the heatlink:

1. Red cable from (2) to L
2. Red cable from (2) to (5)
3. Yellow cable from wall to (3)
4. Brown cable from wall to L
5. Red cable from wall to L
6. Grey cable from wall to N
7. Black cable from wall to N
8. Red cable from wall to (6)
9. Earth to earth

Any help would be greatly appreciated.

Thanks.
 
Sponsored Links
3.jpg
4.jpg


From his media page.
 
Sponsored Links
Thanks both, I thought I'd attached them, appreciate your input.
 
If it helps at all, this is the layout of the control unit's connections - the labels are obscured by the cables on the actual device so thought this might be useful. Cheers.
 

Attachments

  • Screenshot 2020-05-12 at 13.27.27.png
    Screenshot 2020-05-12 at 13.27.27.png
    691.8 KB · Views: 309
Last edited:
By Conventional Boiler, I assume you mean one connected to central heating and a stored hot water system (ie hot water cylinder). If so, the wires simply move from the Salus terminals, to the Nest Heat link terminals that have exactly the same function.

So, the wires in:

IT 500 RX CH C = Nest Heating: Common

IT 500 RX CH NO = Nest Heating: Call for Heat

IT 500 RX L = Nest L

IT 500 RX N = Nest N

IT 500 RX Aux NO = Nest Hot Water: Call for Heat

IT 500 RX Aux C = Nest Hot Water: Common

If you want to use the Heat link to power the Nest Thermostat instead of using a separate plug in power supply, additional wires will need to be run from Heat link T1 & T2 to the Nest thermostat T1 & T2. If this is done, the Heat link also needs an earth connection making to the earth terminal just to the left of T1.
 
Thanks @stem appreciate your help.

Yes, that's what I meant by conventional - I was trying to differentiate from a combi boiler which ours it not. Thanks for clarifying that, it's an 'S' plan system with the boiler connected to the CH and HW cylinder.

That makes sense then re: the connections, thanks for confirming. Can I just ask, with reference to the 'jumper' cables, i.e those wires running between the iT500 connections, not coming from the wall:

1. Jumper cable from CH COM to CH L
2. Jumper cable from CH COM to AUX COM

Am I correct in thinking these need to remain in place on the heatlink as follows:

1. Jumper cable from Nest Heating: Common to Nest L
2. Jumper cable from Nest Heating: Common to Nest Hot Water: Common

I think I'll use a separate plug-in power supply for the Nest Thermostat, I've got suitable place where it can be fixed and where a power supply can be pulled through from the wall behind.

Thanks again,

Mat.
 
Hi Mat
Am I correct in thinking these need to remain in place on the heatlink as follows:

1. Jumper cable from Nest Heating: Common to Nest L
2. Jumper cable from Nest Heating: Common to Nest Hot Water: Common

Yes, all wires should remain connected as they are including the jumpers.

The order of the 'jumpers' can be different if it's easier. Provided that the Heat link (L) is also connected to the commons (2) and (5), you can then introduce the actual 'live' supply wire to any of the three as they are all joined together it doesn't matter which.
 

DIYnot Local

Staff member

If you need to find a tradesperson to get your job done, please try our local search below, or if you are doing it yourself you can find suppliers local to you.

Select the supplier or trade you require, enter your location to begin your search.


Are you a trade or supplier? You can create your listing free at DIYnot Local

 
Sponsored Links
Back
Top