So many popped screws!

Joined
26 Oct 2018
Messages
6
Reaction score
0
Country
United Kingdom
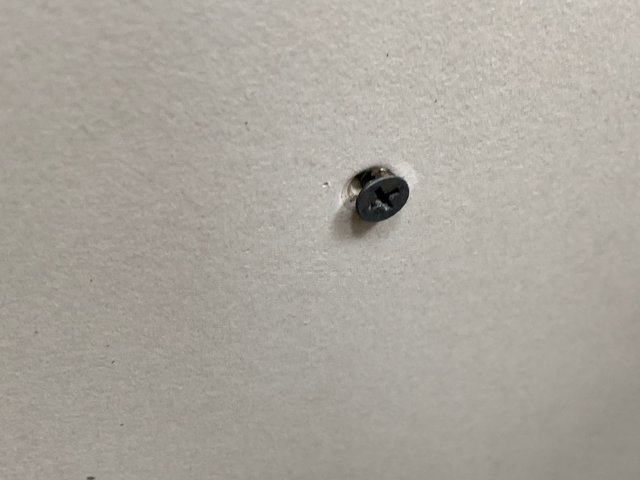
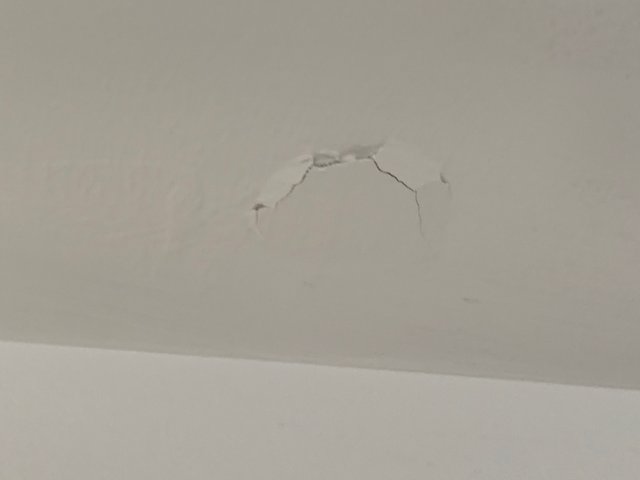
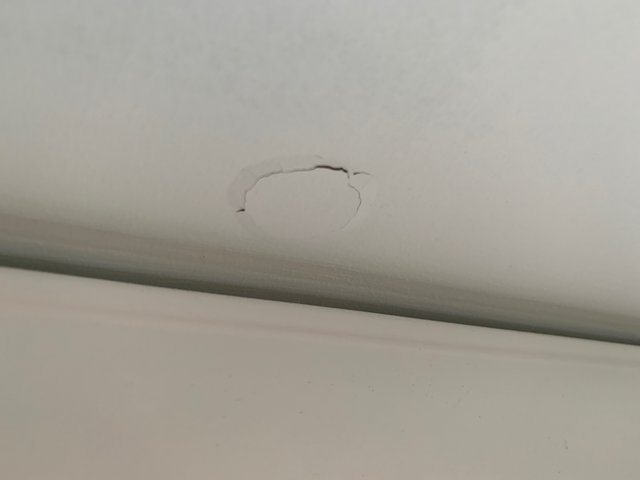
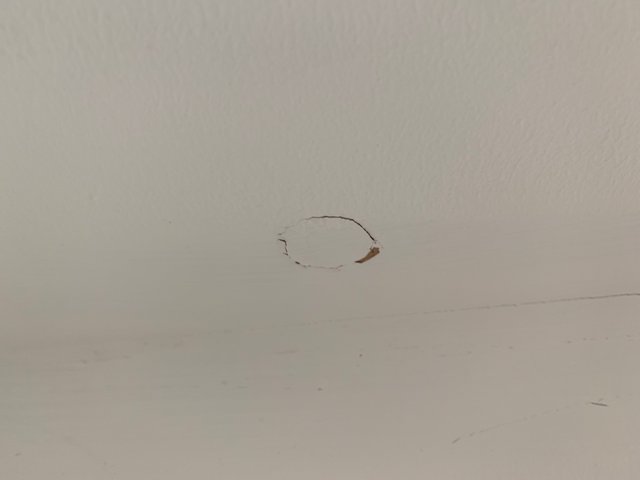
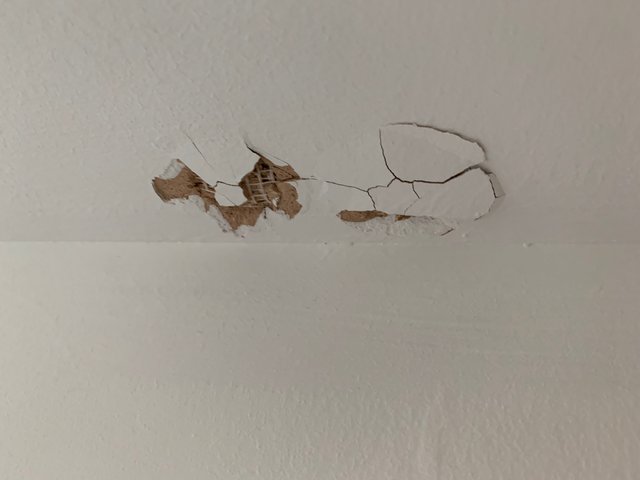
Hi. We've recently had a loft conversion completed and many aspects of it look a bit iffy. This is likely be the first of many posts so please bear with me (sorry!). One thing which really bothers me is all the popped screws. There are over 60 of them that we can see. The conversion includes 3 bedrooms and a bathroom. Do we have grounds for complaint? Or can we just screw them in tighter and cover with filler?

The pictures attached show 2 where the screws have popped from under the plaster, and one where the the screw can be seen (taken inside the eaves storage area, hence no plaster).

Any comments appreciated.

IMG-4850.jpg

IMG-4568.jpg

IMG-4561.jpg
 
Sponsored Links
Take that screw out, and measure and lets see what size it is
 
You can fill these... but the question is... has something moved and caused the screws to pop.

can you take a picture that includes more of the affected area please.
 
Looks like a movement somewhere. When we had our loft done in 2016 we had a few nail pops that i have just fixed last week, about 15 of them.
 
Sponsored Links
You say this is the first of many posts, if they relate to the same conversion it might be better to list the issues up front so the experts on the forum can get an overview of what might be wrong.

Blup
 
I've had a few of these on my last loftie and presume it's my incompetence with regard to not sinking the screws enough, but I'm interested in whether the pros think it's a function of how wet the rafter timber was and how much shrinkage goes on as it all drys out?
 
The visible screwhead indicates that very little care was taken, if any, to get the correct tension on the screw head. You've got head pops already, my guess is you're going to get a lot more. When was this project completed?
 
Hi. Thanks everyone for the replies. The work was completed in 2019. This is one of many issues but the loft company has put everything down to settlement.
Someone asked if we could unscrew the screw from the eaves. Picture below.
IMG-4938.jpg


There are over 60 of the popped screws. Most are under plaster and have pushed that out. Some are subtle like this:
IMG-4535.jpg

Other less so, like this:
IMG-4546.jpg
 
One more thing, one of you guys asked for other things which aren't right. There are too many to list in one thread but as an indicator:
Rear corner of the house (new fascia and brickwork).
IMG-4581.jpg

45 degree air admittance valve (that's in the eaves aka storage area - and it smells horrible when the eaves door is opened). We had a plumber out who confirmed it should be a a 90 degree angle else the valve cannot close.
IMG-4556.jpg


Despite many emails, the loft company has refused to engage with us. We've pretty much given up so trying to fix everything ourselves or with help. Less so when it comes to plumbing. Again, thanks for all your help and advice.
 
I don’t believe pop holes should be that big. Also the air admittance valve should be positioned vertically and not on a 45 degree angle. If the loft company aren’t willing to engage, write them a letter (recorded delivery) or and email stating you’re going to be contacting trading standards. Are building control involved with the conversion at all?
 
Yes, building control were involved which led to some issues being rectified, for example lack of fire doors where needed. The air admittance valve was added after the build was completed. They'd forgotten to add it, having joined a new waste pipe to the air inlet of the existing downstairs waste pipe, i.e. no air could get in at all to begin with. It's actually nice to get some reassurances that we're not being difficult. We have written to them several times and the response has been settlement for everything. We had some more work done recently by contractors (who were fantastic) and they reported, among other things, the new waste pipe had been ill fitted at the drain and leaking into the soil, and a crushed light joint box under a new floor joist, exposing wires which meant we had no electricity downstairs for 2 days as it was deemed dangerous. It was the plumber who advised on the angle of the air admittance valve. We've written about these things too, but no response.
 
Ok, my advice would be to contact trading standards without warning the company, as it seems they’re not interested. Keep us posted (y)
 
You posted a photo of a screw head protruding 2 or 3mm from the surface of the board. As I said previously, but you apparently missed, this, and the excessive number of head pops, indicates that screws were not driven to the correct tension. When screws are not at the correct tension, boards are able to move - but the screws does not move - and this movement causes the skim to break off around the screw head. In the olden days it was called a nail pop. Repairing (patching) heads as you go won't solve the problem, the screws need to be tensioned correctly. Not one or two of them, but all of them.

Another thing you should look for is the spacing of screws. This will also contribute to excessive head popping - and is a much easier thing to take action on. Many boarders get spacing wrong but some - the particularly lazy ones - get it very wrong. A good way to check this is use a strong magnet - you can get one about 8 or 10mm across on ebay. The magnet should stick to the screw heads, indicating where they are. (a heavy magnet is no good, it won't stick. Get a strong small one - light weight) Mark then with a pencil as you go. Centres for wall boards should be maximum 300mm apart and for ceilings 230mm apart. (I'll bet they aren't) I've seen boarders putting in screws 600 or 700mm centres and think it's ok.

If you find excessive spacings your claim is much easier because you can quantify exactly what needs to be done to resolve the issue. Screws will need to be exposed and tensioned correctly, additional screws added and the skim made good and decorated. Get a cost to do this and claim that amount plus expenses.
 
Thanks, John. I'm not sure if we should be worried about that as it sounds like potentially messy work. Then again, we need to get it sorted. Oddly enough my other half has one of those super magnets - it looks like a big watch battery?, he used it to locate ceiling joists when marking out snug fixtures.
 

DIYnot Local

Staff member

If you need to find a tradesperson to get your job done, please try our local search below, or if you are doing it yourself you can find suppliers local to you.

Select the supplier or trade you require, enter your location to begin your search.


Are you a trade or supplier? You can create your listing free at DIYnot Local

 
Sponsored Links
Back
Top