Hello All,
I've gone round and round in circles on this and would appreciate some input please....
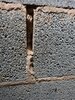
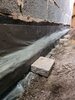
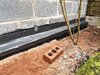
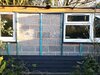
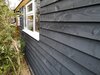
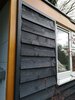
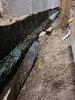
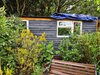
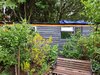
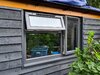
Last autumn a workshop was built at the back of my garden, it was built on a concrete slab and constructed of med-density concrete blocks (single skin) with a OSB roof covered EPDM. Last winter I had issues with rising damp, penetrative damp and condensation. I've been addressing these slowly over the year but it has not been simple, for example 2 of the walls are barely accessible from the outside, I've to remove fence panels and gain access to neighbours gardens and even then I've had to work in a narrow 18" gap. However I think/hope I have remediated externally the rising damp and penetrative damp for the main 2 problematic walls (we shall see!). I have also installed a 6" inline fan with the intention to improve airflow and help with condensation (still working out where to add more vents).
This is a workshop and storage area as I have no garage, it doesn't need to look pretty inside but I want it dry and clean. To that end I want to dustproof the floor and protect the walls to reduce dust from the concrete.
I will not plasterboard straight away, I want to keep an eye on the walls for dampness, and if necesaary I will tank the walls with slurry.
But assuming no problems, (or maybe assuming some minor dampness), what platerboards would I be best using please? And should I use dot and bad directly onto the block wall or use batons? I was inclined to use a dry fixing like Soudal plasterboard adhesive foam to stick straight to the walls, but then with batons I figured it would be easier to remove the plasterboard if necessary (e.g. if I needed to add insulation or similar at a later date) and it would also leave a gap in case of any minor dampness.
I will likely leave the plasterboard bare, or possibly paint.
(Not related to this forum group, but I was also considering adding some wool insulation between the roof joists to help reduce condensation, but then I read that this might lead to condensation sitting on top of the insulation (There is not enough room to leave a gap between the OSB board roof and any layer of insulation fitted)).
Any thoughts or advise would be most welcome!
I've gone round and round in circles on this and would appreciate some input please....
Last autumn a workshop was built at the back of my garden, it was built on a concrete slab and constructed of med-density concrete blocks (single skin) with a OSB roof covered EPDM. Last winter I had issues with rising damp, penetrative damp and condensation. I've been addressing these slowly over the year but it has not been simple, for example 2 of the walls are barely accessible from the outside, I've to remove fence panels and gain access to neighbours gardens and even then I've had to work in a narrow 18" gap. However I think/hope I have remediated externally the rising damp and penetrative damp for the main 2 problematic walls (we shall see!). I have also installed a 6" inline fan with the intention to improve airflow and help with condensation (still working out where to add more vents).
This is a workshop and storage area as I have no garage, it doesn't need to look pretty inside but I want it dry and clean. To that end I want to dustproof the floor and protect the walls to reduce dust from the concrete.
I will not plasterboard straight away, I want to keep an eye on the walls for dampness, and if necesaary I will tank the walls with slurry.
But assuming no problems, (or maybe assuming some minor dampness), what platerboards would I be best using please? And should I use dot and bad directly onto the block wall or use batons? I was inclined to use a dry fixing like Soudal plasterboard adhesive foam to stick straight to the walls, but then with batons I figured it would be easier to remove the plasterboard if necessary (e.g. if I needed to add insulation or similar at a later date) and it would also leave a gap in case of any minor dampness.
I will likely leave the plasterboard bare, or possibly paint.
(Not related to this forum group, but I was also considering adding some wool insulation between the roof joists to help reduce condensation, but then I read that this might lead to condensation sitting on top of the insulation (There is not enough room to leave a gap between the OSB board roof and any layer of insulation fitted)).
Any thoughts or advise would be most welcome!