

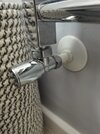
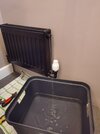
If you were to change the whole valve then if you have a sealed system - pressure gauge on the boiler or filling loop - then you would only have to depressurise the system and drain down the rad itself. Turn off all the other rads at their TRV and then once the system is depressurised it will stop draining.
Then just drain the rad and swap the valve.
Then just drain the rad and swap the valve.


")