Would You crack on?

Joined
23 Apr 2011
Messages
89
Reaction score
0
Location
Oxfordshire
Country
United Kingdom
Hi All

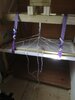
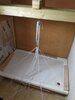
I’m just about to secure my shower tray (Mira Flight 900/1400) down onto a ply subfloor but have a single high spot of 3mm at one corner (Measured with level and shims). I wanted to avoid having to bed on a weak mix as the tray is v tight to the 3 walls and I’ll likely F%#@£ that up. I’ve got some CT1 I was going to use to secure the tray.

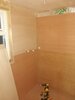
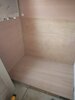
I’ve poured water on the tray and it appears to drain ok. I’ve also checked the inner tray levels toward the trap and both sides appear similar. So, would you crack on or do the bedding thing in the hope the 3mm would be corrected?

hope you can help, this job is dragging!!!

thanks

G
 
Sponsored Links
Personally I would crack on , 3 mm is nothing especially as you have tested it and it's draining ok
 
It will look great until you try and fit the shower doors then the fun starts, get it level or expect to spend even longer trying to get the doors to open and shut properly.
 
It will look great until you try and fit the shower doors then the fun starts, get it level or expect to spend even longer trying to get the doors to open and shut properly.
Assuming it’s to have a door.
 
Sponsored Links
a single high spot of 3mm at one corner

Why is it 3mm high at one corner, can you not pack it to level it all out or tighten it down further?

3mm isn't a huge amount but as suggested it can become a pain in the A$$ if you need to try and square things up to it.
 
Hi,
Sounds like you're at the same stage as me. My tray was a tight fit between 3 walls (but the tape measure says I have 10mm to play with). I have taken the ply off the left hand wall to allow a level fit, then I will wedge in whatever fits and tile up from that. Don't know if you're able to do this?
 

Attachments

  • IMG_20200618_190602.jpg
    IMG_20200618_190602.jpg
    170.4 KB · Views: 235
  • IMG_20200523_212956.jpg
    IMG_20200523_212956.jpg
    142.6 KB · Views: 247
  • IMG_20200523_200616.jpg
    IMG_20200523_200616.jpg
    197.7 KB · Views: 242
  • IMG_20200613_191015.jpg
    IMG_20200613_191015.jpg
    183.3 KB · Views: 240
Thanks for the replies.

Its 3mm high as I had a real pain in the backside with levelling the floor. I had to splice a couple of joists with steel plates due to rotten ends; its an old house and getting it level to where it is was extremely difficult! (for me) especially and I've just discovered my spirit level was just out (replaced with a Stablila). The 3 walls of the enclosure are square and plumb, done out with backer board. But my measurements were almost too accurate and its left me with a very tight fit, it would be especially difficult for me to bed on a sand/cement whilst guaranteeing I solve the 3mm problem! I don't think using shims to level the tray would work as it would mean some of areas of the tray wouldn't be in contact with the ply.

With regard the 3mm difference for the rest of the enclosure, I'll account for it on the first course of tiles (subway), I'll be starting from the second course using a laser level to ensure any discrepancies don't continue over the whole wall.

It's a stone / resin tray and will be fitted with a single wet room screen from Mira. Worth noting that the front edge on which the screen will be fitted is level, its the back right corner which is 3mm out.(one furthest from entrance and adjacent to shower head). Shame as the floor is solid and the enclosure is square. :confused:.

Wouldn't an extra fat bead of CT1 on the lower side at least take a mil or two out of the difference?

Thanks again fellas.
 
Hi,
Sounds like you're at the same stage as me. My tray was a tight fit between 3 walls (but the tape measure says I have 10mm to play with). I have taken the ply off the left hand wall to allow a level fit, then I will wedge in whatever fits and tile up from that. Don't know if you're able to do this?


Thats some solution to the problem! I was thinking of something similar but can't see how I'd manage it with the enclosure at the stage its at, I'd have to remove the backer board from one of the walls, taking all the tanking with it. Are you going to bed on cement or use silicone?
 
If it's stone resin, would you be laying tray onto a bed of tile adhesive/sand cement base? If so, can't the 3mm be corrected then?
 
If it's stone resin, would you be laying tray onto a bed of tile adhesive/sand cement base? If so, can't the 3mm be corrected then?

As I thought it was level, I was going to lay on silicone, as per Mira instructions. Laying on adhesive / cement will be very difficult with the snug fit and to be honest so there's no guarantees I'd easily correct the 3mm. I'm going to run off for 10 mins to chuck some water down for a video. :eek:
 
Thats some solution to the problem! I was thinking of something similar but can't see how I'd manage it with the enclosure at the stage its at, I'd have to remove the backer board from one of the walls, taking all the tanking with it. Are you going to bed on cement or use silicone?
If you take the backer board off, could you cut a bit off the bottom (the width of the shower tray), then refit backer board. Not sure how much this would compromise the tanking. I'm slapping a load of tile adhesive on my base.
 
If it was me, I'd be packing in a 3mm piece of ply to support the majority of the gap if the tray isn't going to sit perfectly flat at that corner. If it is then the other option as you have already suggested is to use the tile to take up the gap.

The critical part of it a tray fit is to ensure the tray is fully supported over its whole base as any gap below will allow the tray to move/flex longer term and can then burst the watertight seal, even with a stone resin tray, no matter what it is being bedded in with.
 
If you take the backer board off, could you cut a bit off the bottom (the width of the shower tray), then refit backer board. Not sure how much this would compromise the tanking. I'm slapping a load of tile adhesive on my base.

Thats likely the last resort mate! Not sure why levels don't have lines closer to the bubble for more accurate reading! I've just been out and bought a Stabila, the bubble still sits within the lines, but obviously offset slightly.
 
I would rethink the silicone option. My tray is 1400x900 like yours and weighs in at 60kg! (That why I made my lift for it). I'm only a diyer but I wouldn't be putting silicone under that much weight in stone resin TBH.
 

DIYnot Local

Staff member

If you need to find a tradesperson to get your job done, please try our local search below, or if you are doing it yourself you can find suppliers local to you.

Select the supplier or trade you require, enter your location to begin your search.


Are you a trade or supplier? You can create your listing free at DIYnot Local

 
Sponsored Links
Back
Top