We don't use any sealing membranes on a garage pit.
And don't see the need for one on an outside pit either. If any leaks occur we can stop them.
We pour a base with folded 393 mesh, part in the floor and up the walls.
Then kicker pegs using reinforcing or stainless bar section, shutter round, fit the shoring props and pour.
A concrete kicker is better though and would recommend it.
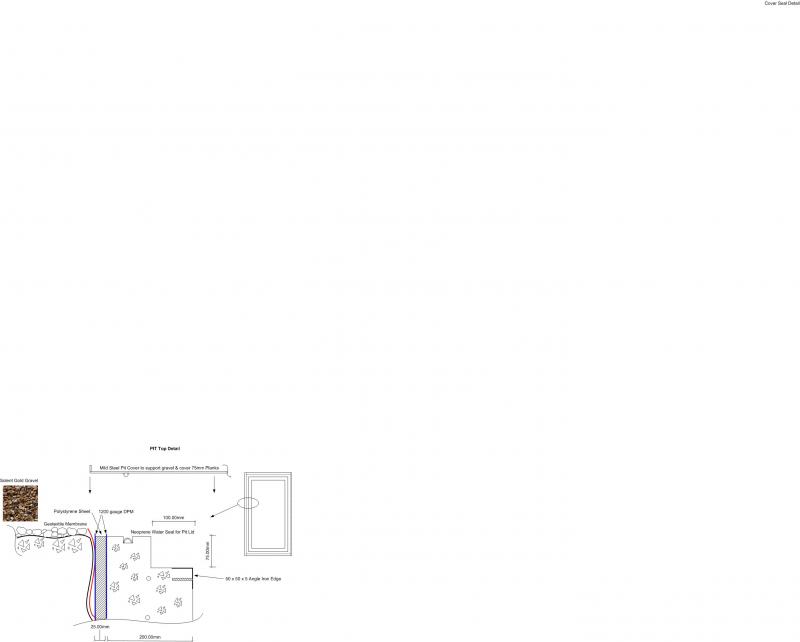
The joint between the floor and wall wil be fine without any sealer but if you want, nail on some benonite.
Just be sure to have a minimum of 100mm of cover either side as it eventually pushes with quite a lot of pressure.
And don't see the need for one on an outside pit either. If any leaks occur we can stop them.
We pour a base with folded 393 mesh, part in the floor and up the walls.
Then kicker pegs using reinforcing or stainless bar section, shutter round, fit the shoring props and pour.
A concrete kicker is better though and would recommend it.
The joint between the floor and wall wil be fine without any sealer but if you want, nail on some benonite.
Just be sure to have a minimum of 100mm of cover either side as it eventually pushes with quite a lot of pressure.
")