

Here's a set of photo's of what I did today.
If it had of been a new cable installation it would have been better, but there where a few cables that weren't long enough to allow the luxury of too much choice in the looming and setting out.
Picture 1
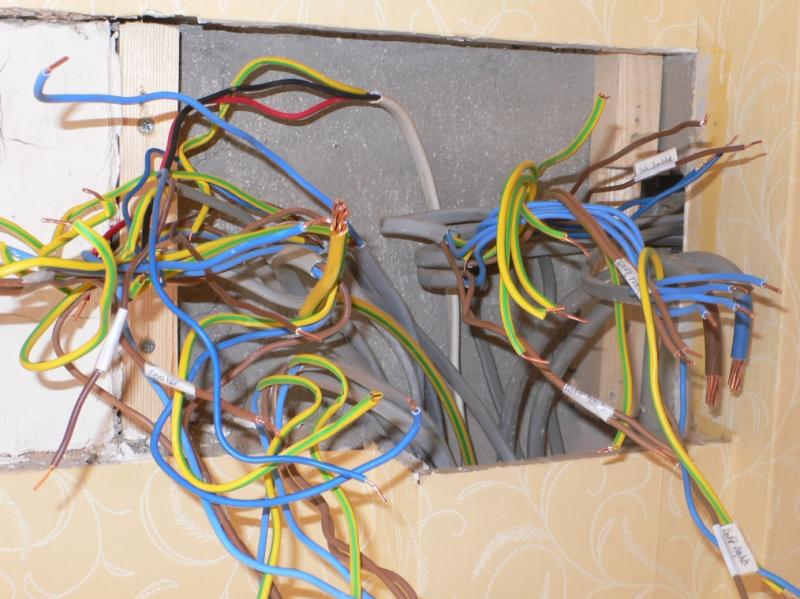
The old box was recessed, so I had to cut out some plaster and 10mm of brick. The little dremel and 30 minutes later.
picture 2
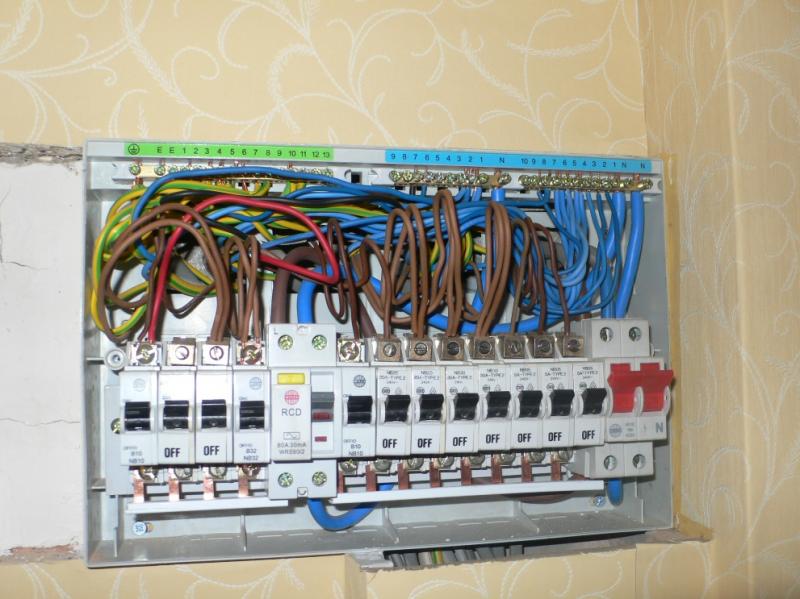
The old CU wiring exposed, I did that about 4 years ago (in a rush)
Picture 3
Time to get serious with the screw driver
Picture 4
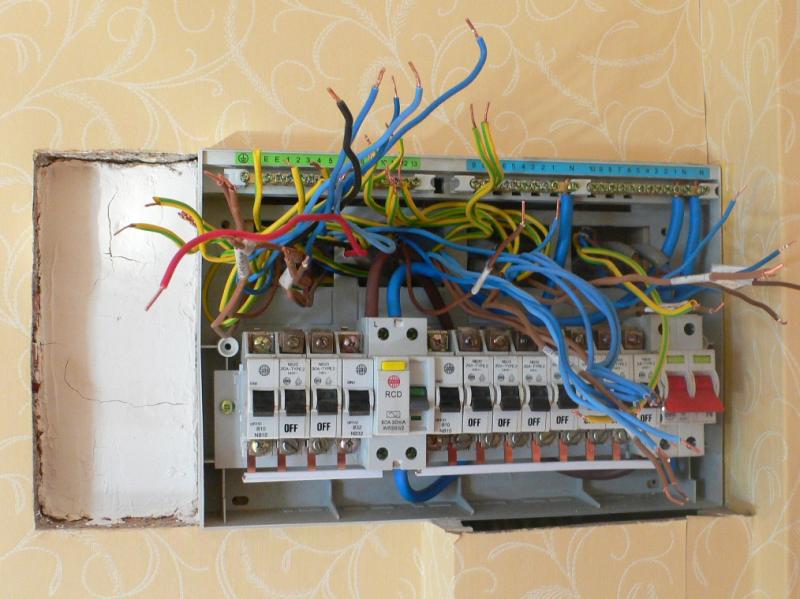
The old CU off and the original render cavity beside the new cut area
Picture 5
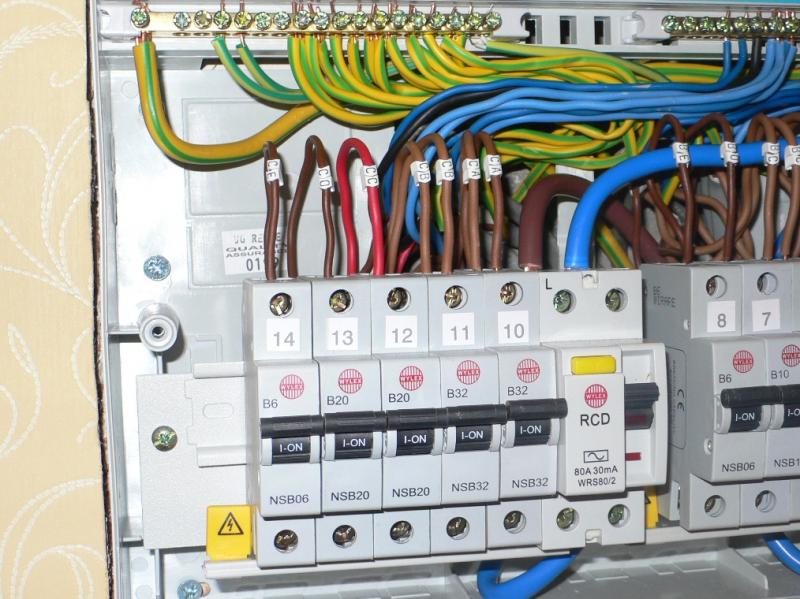
Behold a new CU. Cable markers were left over from an LUL job.
Since the Circuits are A, B and C (direct, RCD 1 and RCD 2).
I labelled them as Circuit A 1st AA, 2nd AB, 3rd AC etc
Picture 6
The earth signal wires from the RCBO's in position Circuit A. 1 and 2 aren't friging long enough to terminate on earth positions 1 and 2.
So there on 15 (spare) at the moment. Wylex you tight sods, make them longer.
Picture 7
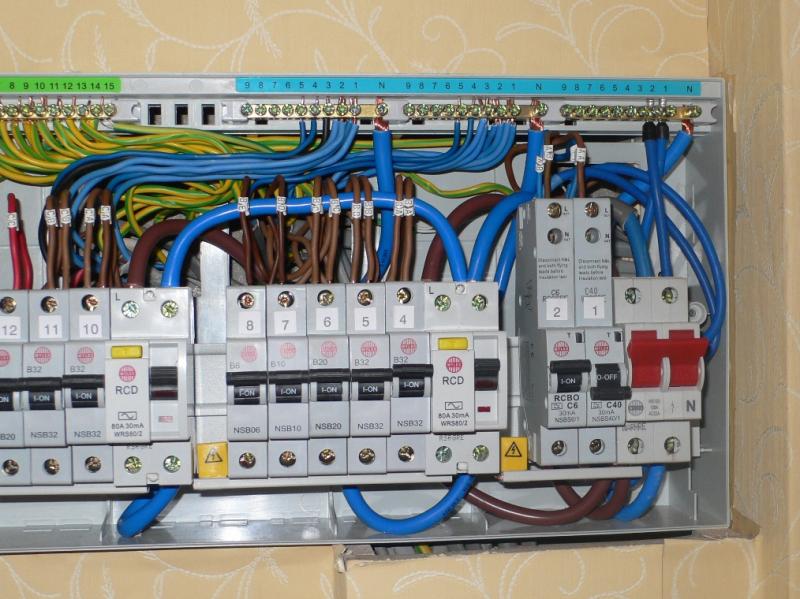
More of the same
Picture 8
More of the same
Picture 9
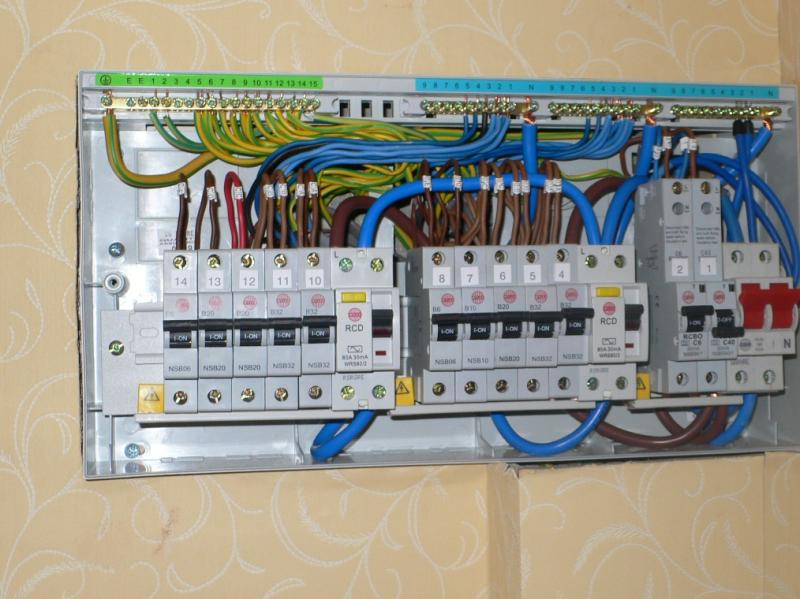
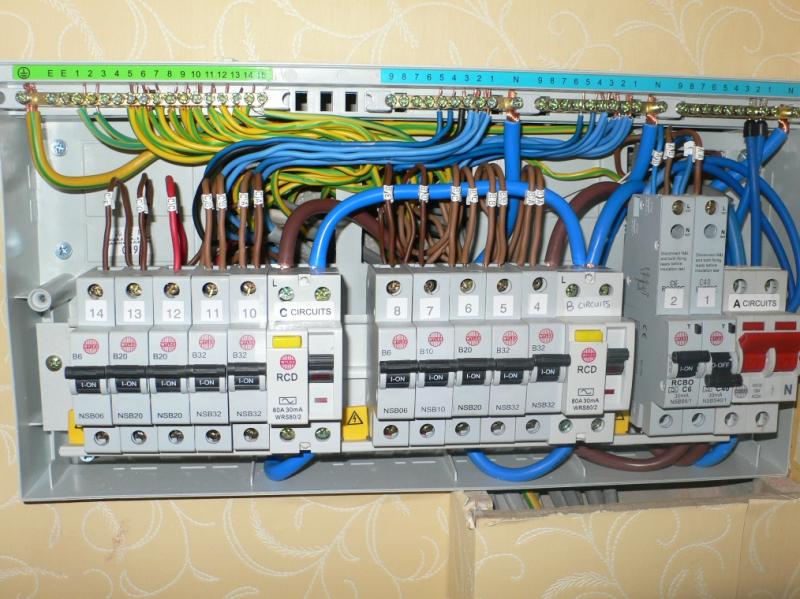
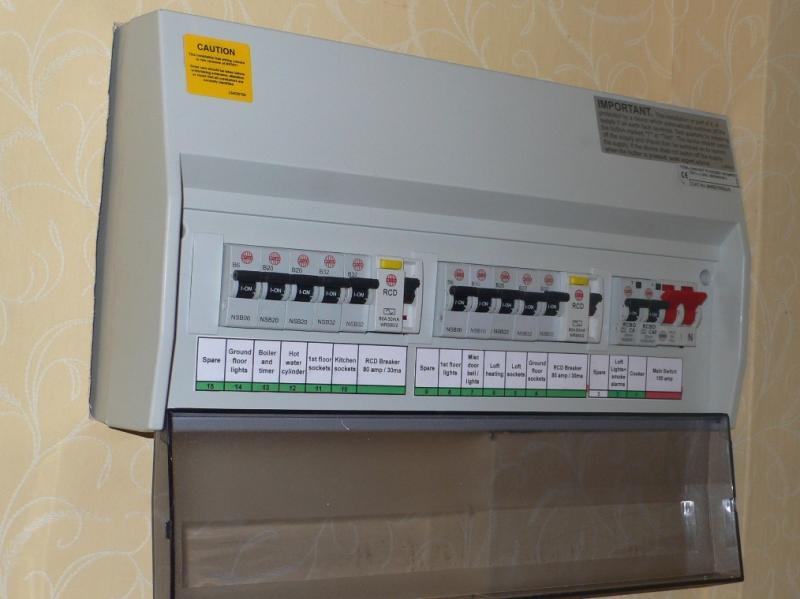
Cover on, labels sorted (MS excel with the cells sized correctly). Although you will notice they are slightly too small due to the printer bing dross.
Picture 10
Just cut too large a void for the CU to seamlessly fit, never mind a bead of caulk and redo the wall paper some time.
There are a few things wrong. The earth signal cables annoy me, and again due to being 2cm short there's a pair of earths on earth 9 rather than earth 4.
When I sort out my soldering gun I'll cut, tin and re terminate the factory neutrals on the neutral bars (I don't see why they need to have 5mm of core showing below the bars). I'll extend the earths to the correct point at the same time.
So if this site was Master Chef would I get past the 1st round
Flame suit on, so fire away
If it had of been a new cable installation it would have been better, but there where a few cables that weren't long enough to allow the luxury of too much choice in the looming and setting out.
Picture 1
The old box was recessed, so I had to cut out some plaster and 10mm of brick. The little dremel and 30 minutes later.

picture 2
The old CU wiring exposed, I did that about 4 years ago (in a rush)
Picture 3
Time to get serious with the screw driver
Picture 4
The old CU off and the original render cavity beside the new cut area
Picture 5
Behold a new CU. Cable markers were left over from an LUL job.
Since the Circuits are A, B and C (direct, RCD 1 and RCD 2).
I labelled them as Circuit A 1st AA, 2nd AB, 3rd AC etc
Picture 6
The earth signal wires from the RCBO's in position Circuit A. 1 and 2 aren't friging long enough to terminate on earth positions 1 and 2.
So there on 15 (spare) at the moment. Wylex you tight sods, make them longer.
Picture 7
More of the same
Picture 8
More of the same
Picture 9
Cover on, labels sorted (MS excel with the cells sized correctly). Although you will notice they are slightly too small due to the printer bing dross.
Picture 10
Just cut too large a void for the CU to seamlessly fit, never mind a bead of caulk and redo the wall paper some time.
There are a few things wrong. The earth signal cables annoy me, and again due to being 2cm short there's a pair of earths on earth 9 rather than earth 4.
When I sort out my soldering gun I'll cut, tin and re terminate the factory neutrals on the neutral bars (I don't see why they need to have 5mm of core showing below the bars). I'll extend the earths to the correct point at the same time.
So if this site was Master Chef would I get past the 1st round
Flame suit on, so fire away

 or is that an illusion?