- Joined
- 16 Jun 2022
- Messages
- 9
- Reaction score
- 0
- Country

Love this forum, I’ve been able to answer so many questions and am really grateful for all the time put into helping complete strangers to learn.
My question is more about whether it’s pointless to attempt this rather than how to do it. My house was built in 2004 at the height of the rush-to-build-to-sell market and isn’t terrible but has issues which I try to resolve when I can.
Background
We’re getting the carpets changed so have an opportunity to get under the floors and:
- Solve severe creaking of many chipboard floor panels.
- Change hanging lights for spotlights in all communal areas except bathroom.
- Reduce ticking sound of some radiator pipes as they expand.
- Lag underfloor heating and hot water pipes (definitely worth it if you can access them).
- Put thermal/sound insulation above ground floor.
- Extend wire-interlinked smoke alarms from communal areas into bedrooms (3-story house so want to be fire extra fire safe).
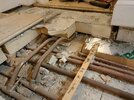
My main doubt is over the floor panels (2400 x 600 22mm chipboard). They’re lazily installed (gaps filled with carpet offcuts; 2mm of step between corridor and bedrooms; massive amount of levelling cement between top of stairs and adjoining panel about 10mm below; panels not glued/nailed down in many places), and some visibly flex with an 80kg person standing on them (not worryingly, it’s just that you can see it).
Questions
1. Remove ceiling instead? Should I give up on taking up the floor and just pull down the ceilings? Re-installing a ceiling is something I’m less confident about doing so would get in a pro. Non-preferred due to cost and waiting time, but maybe that’s the better choice. Maybe it’s doable to cut lots of small access holes in the ceilling but I feel like the amount of access I need would make it worth removing whole panels.
2. Remove with care? Is it worth the time to take the floor panels out delicately or is it quicker in the long run just to pull off skirting boards and rip up the chipboard?
3. Plywood? This is a question that gets asked a lot but not clear if it’s best for my plans. If I’m going to be taking up floor panels and can do it more quickly by damaging them, should I replace with plywood? Cost isn’t an issue since the ply will cost much less than the carpets and will last much longer, and because I can leave in sity any chipboard that I don't need to get under.
The corridors run parallel to joists so the span between seams only 600mm which creates a lot of of flex points, maybe this issue would still exist in the ply?
4. T&G or butt? I try to avoid anything that's really difficult to disassemble, but I do understand the importance T&G has for rigidity in regions with no support underneath. Is there a way around this? eg. Near walls I could cut the chipboard panel out and router a step into them (to make a butted rabbet joint) - the board by the wall won’t receive weight on it so having a step instead of T&G should be rigid.
Or should I give in and accept that the best floors are T&G then glued and screwed?
Thank you!
My question is more about whether it’s pointless to attempt this rather than how to do it. My house was built in 2004 at the height of the rush-to-build-to-sell market and isn’t terrible but has issues which I try to resolve when I can.
Background
We’re getting the carpets changed so have an opportunity to get under the floors and:
- Solve severe creaking of many chipboard floor panels.
- Change hanging lights for spotlights in all communal areas except bathroom.
- Reduce ticking sound of some radiator pipes as they expand.
- Lag underfloor heating and hot water pipes (definitely worth it if you can access them).
- Put thermal/sound insulation above ground floor.
- Extend wire-interlinked smoke alarms from communal areas into bedrooms (3-story house so want to be fire extra fire safe).
My main doubt is over the floor panels (2400 x 600 22mm chipboard). They’re lazily installed (gaps filled with carpet offcuts; 2mm of step between corridor and bedrooms; massive amount of levelling cement between top of stairs and adjoining panel about 10mm below; panels not glued/nailed down in many places), and some visibly flex with an 80kg person standing on them (not worryingly, it’s just that you can see it).
Questions
1. Remove ceiling instead? Should I give up on taking up the floor and just pull down the ceilings? Re-installing a ceiling is something I’m less confident about doing so would get in a pro. Non-preferred due to cost and waiting time, but maybe that’s the better choice. Maybe it’s doable to cut lots of small access holes in the ceilling but I feel like the amount of access I need would make it worth removing whole panels.
2. Remove with care? Is it worth the time to take the floor panels out delicately or is it quicker in the long run just to pull off skirting boards and rip up the chipboard?
3. Plywood? This is a question that gets asked a lot but not clear if it’s best for my plans. If I’m going to be taking up floor panels and can do it more quickly by damaging them, should I replace with plywood? Cost isn’t an issue since the ply will cost much less than the carpets and will last much longer, and because I can leave in sity any chipboard that I don't need to get under.
The corridors run parallel to joists so the span between seams only 600mm which creates a lot of of flex points, maybe this issue would still exist in the ply?
4. T&G or butt? I try to avoid anything that's really difficult to disassemble, but I do understand the importance T&G has for rigidity in regions with no support underneath. Is there a way around this? eg. Near walls I could cut the chipboard panel out and router a step into them (to make a butted rabbet joint) - the board by the wall won’t receive weight on it so having a step instead of T&G should be rigid.
Or should I give in and accept that the best floors are T&G then glued and screwed?
Thank you!
")