- Joined
- 5 Oct 2020
- Messages
- 144
- Reaction score
- 3
- Country

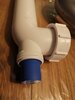
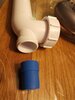
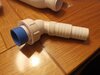
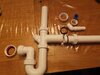
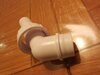
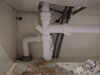
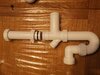
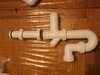
Can anybody please confirm if I've installed that blue blanking plug correctly as doesn't appear to be made of much and isn't that difficult to pull out? Should it be glued in or just pushed in? Sealant around it?? Pictures below.