• Looking for a smarter way to manage your heating this winter? We’ve been testing the new Aqara Radiator Thermostat W600 to see how quiet, accurate and easy it is to use around the home. Click here read our review.

Would this be possible?

Ideally get one of these - A bleed key - you'll get them most places, SF/TS/B&Q/Etc or Amazon

View attachment 390234
Try not to use a screwdriver, they're not the best tool to use and can snap a tight bleed screw

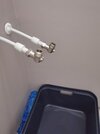
Bleeding the rad should have nothing to do with the bottom connector, apart from the fact that there's pressurised water in there. The coupler is leaking because something isn't quite right and it'll either need tightened up or replaced.

2 different kinds probably due to the fact that one of the originals needed replaced.
The amount of times I've looked at them keys ‍:LOL:. I've fixed the leak just a little tighten and it's fine

I wasn't sure how much to bleed the radiator it comes out a little hole near the top but the water seems clear
 
Last edited:
OK, something similar to this

View attachment 388848

So out the floor and a 45 deg immediately to take the pipe back to the corner with another 45 deg to bring it back vertical, then up to the level of where the trap will be then a 90deg to bring it horizontal over to the traps outlet.
So I'm starting this today for some reason this makes me so nervous about messing it up.

The bottom pipe seems quite stable enough that it won't move.

I'm just going to set it up without using the glue to behind with.

I've used a 45 to go back to the wall then a tiny offcut of pipe to connect another 45..
IMG_20250821_140155.jpg
IMG_20250821_143724.jpg
IMG_20250821_143732.jpg


Also with the picture you put on which I'm using as a guide there compression fittings?

1754302446237.png
 
Last edited:
Just got to work out how much pipe I need to cut to put in between the 45s I think it's around 55cm,but does this look ok?

With fitting the tap tails do I need these
IMG_20250821_165402.jpg


Tap tail adaptors

IMG_20250821_152604.jpg
IMG_20250821_152620.jpg
 
Last edited:
Yes that all looks fine, wasn't exactly what I had in mind. As per the pic I sent, I meant to bring the pipe straight up the back of the unit vertically after the 45's and then just a 90deg bend and straight over to the bottle/p trap for the basin but no matter -

I would also maybe have gone with these isolation valves to keep the tap pipework at the back of the unit out of the way.

1755792864767.png https://www.toolstation.com/flat-faced-male-angled-isolating-valve/p31424

They have flat faces too so no need for the tail adapters
 
Yes that all looks fine, wasn't exactly what I had in mind. As per the pic I sent, I meant to bring the pipe straight up the back of the unit vertically after the 45's and then just a 90deg bend and straight over to the bottle/p trap for the basin but no matter -

I would also maybe have gone with these isolation valves to keep the tap pipework at the back of the unit out of the way.

View attachment 390472 https://www.toolstation.com/flat-faced-male-angled-isolating-valve/p31424

They have flat faces too so no need for the tail adapters
I'll have another go later it's not welded just wanted to check so so thing like this would be better?
IMG_20250821_175621.jpg


Yes those iso valves would be better hopefully screwfix do the as that's nearer. It's just when I had the smaller iso's on it was leaking more.

The only problem with changing them is hacksawing the olive on the flixi pipe again, or maybe it'll just fit the new one
 
Last edited:
so something like this would be better?
Yes, don't forget to dry install the basin waste and trap so you can get the height and length correct.
hopefully screwfix do the as that's nearer
Unfortunately I don't think they do.
You could also use a 10mmx15mm stem elbow and use the ISO's you have, once the nuts cut off the current stem reducer, you will need new olives though.

1755853412395.png

 
Yes, don't forget to dry install the basin waste and trap so you can get the height and length correct.

Unfortunately I don't think they do.
You could also use a 10mmx15mm stem elbow and use the ISO's you have, once the nuts cut off the current stem reducer, you will need new olives though.

View attachment 390545

I'll nip Toolstation today but knowing my luck ill install them iso valves and then they'll be leaking so will need to go screwfix to buy the stem elbows :D
 
Yes, don't forget to dry install the basin waste and trap so you can get the height and length correct.

Unfortunately I don't think they do.
You could also use a 10mmx15mm stem elbow and use the ISO's you have, once the nuts cut off the current stem reducer, you will need new olives though.

View attachment 390545

Looks better and hopefully I can use shorter tap tails now
 

Attachments

  • IMG_20250822_161420.jpg
    IMG_20250822_161420.jpg
    97 KB · Views: 26
Ive changed the pipe so it goes straight up then into a 90, agree the pipes sticking out are a bit of a nuisance, especially the cold which seems to be Inline with the waste trap.

I take it I'd have to cut the plasterboard to feed them back if they even had the space? The current tap tails are 400mm I think I'd struggle with the angle if I tried 300mm

IMG_20250822_220642.jpg
IMG_20250822_220659.jpg
 
Yeah - have you loosed the pipe wall covers, they may be holding the pipe? If they simply won't push back in then the only other thing would be to cut the 10mm pipes shorter, that would mean getting a 15mm HEP demounting tool to take the stem reducers off, cut the 10mm plastic back and then refit the couplers. That's if the existing 10mm inserts actually stay in the pipe and don't get stuck in the coupler when demounting.

If they do then it's new inserts and reducing couplers.
The pipe covers move no problem but the pipes won't budge at all.

Are these the parts I need if I were to shorten them. Also is there a easy way to cut through the pipe? I've got one of these but

Coupler

Inserts

Key

Pipe cutters
 
Last edited:
Unfortunately those links don't work, apart from the pipe cutter link. There's something wrong with the site when imbedding links. Better just to cut and paste from the site address straight to the page.

As far as the pipes are concerned then there may be elbows behind it and they won't go back further. Those pipe cutters are fine and if you have one of the green keys
1755950508145.png a couple of these 1755950561404.png and a couple of these, just in case 1755950637398.png then you can shorten the pipework

In fact if you have the inserts and new reducing stem couplers then you don't need the key as you just cut the pipe back, fit the inserts and the new reducers, then just take the ISO valves off the old reducers and refit onto the new ones.
 
Unfortunately those links don't work, apart from the pipe cutter link. There's something wrong with the site when imbedding links. Better just to cut and paste from the site address straight to the page.

As far as the pipes are concerned then there may be elbows behind it and they won't go back further. Those pipe cutters are fine and if you have one of the green keys
View attachment 390621 a couple of these View attachment 390622 and a couple of these, just in case View attachment 390623 then you can shorten the pipework

In fact if you have the inserts and new reducing stem couplers then you don't need the key as you just cut the pipe back, fit the inserts and the new reducers, then just take the ISO valves off the old reducers and refit onto the new ones.
I did wonder about the links not opening thought it was my phone.

https://www.screwfix.com/p/hep2o-plastic-push-fit-stem-coupler-f-10mm-x-m-15mm/7947f?ref=SFAppShare

Yes the stems and key are the same just checking the couplers are the same.

I'll get the key it'll come in handy for future projects.

I'm abit nervous about turning the hot water off at the stopcock as when I turn it back on it hasn't worked twice cue panic!! Sprayed it yesterday with some wd 40 left a few mins and it seems to have done the trick either that or by switching the cold back in it did something.
 
Last edited:

If you need to find a tradesperson to get your job done, please try our local search below, or if you are doing it yourself you can find suppliers local to you.

Select the supplier or trade you require, enter your location to begin your search.


Are you a trade or supplier? You can create your listing free at DIYnot Local

 
Back
Top